Welcome to the Death Star Mobile Build Log Part 4!
Click here for: Part 1 | Part 2 | Part 3 | Part 5
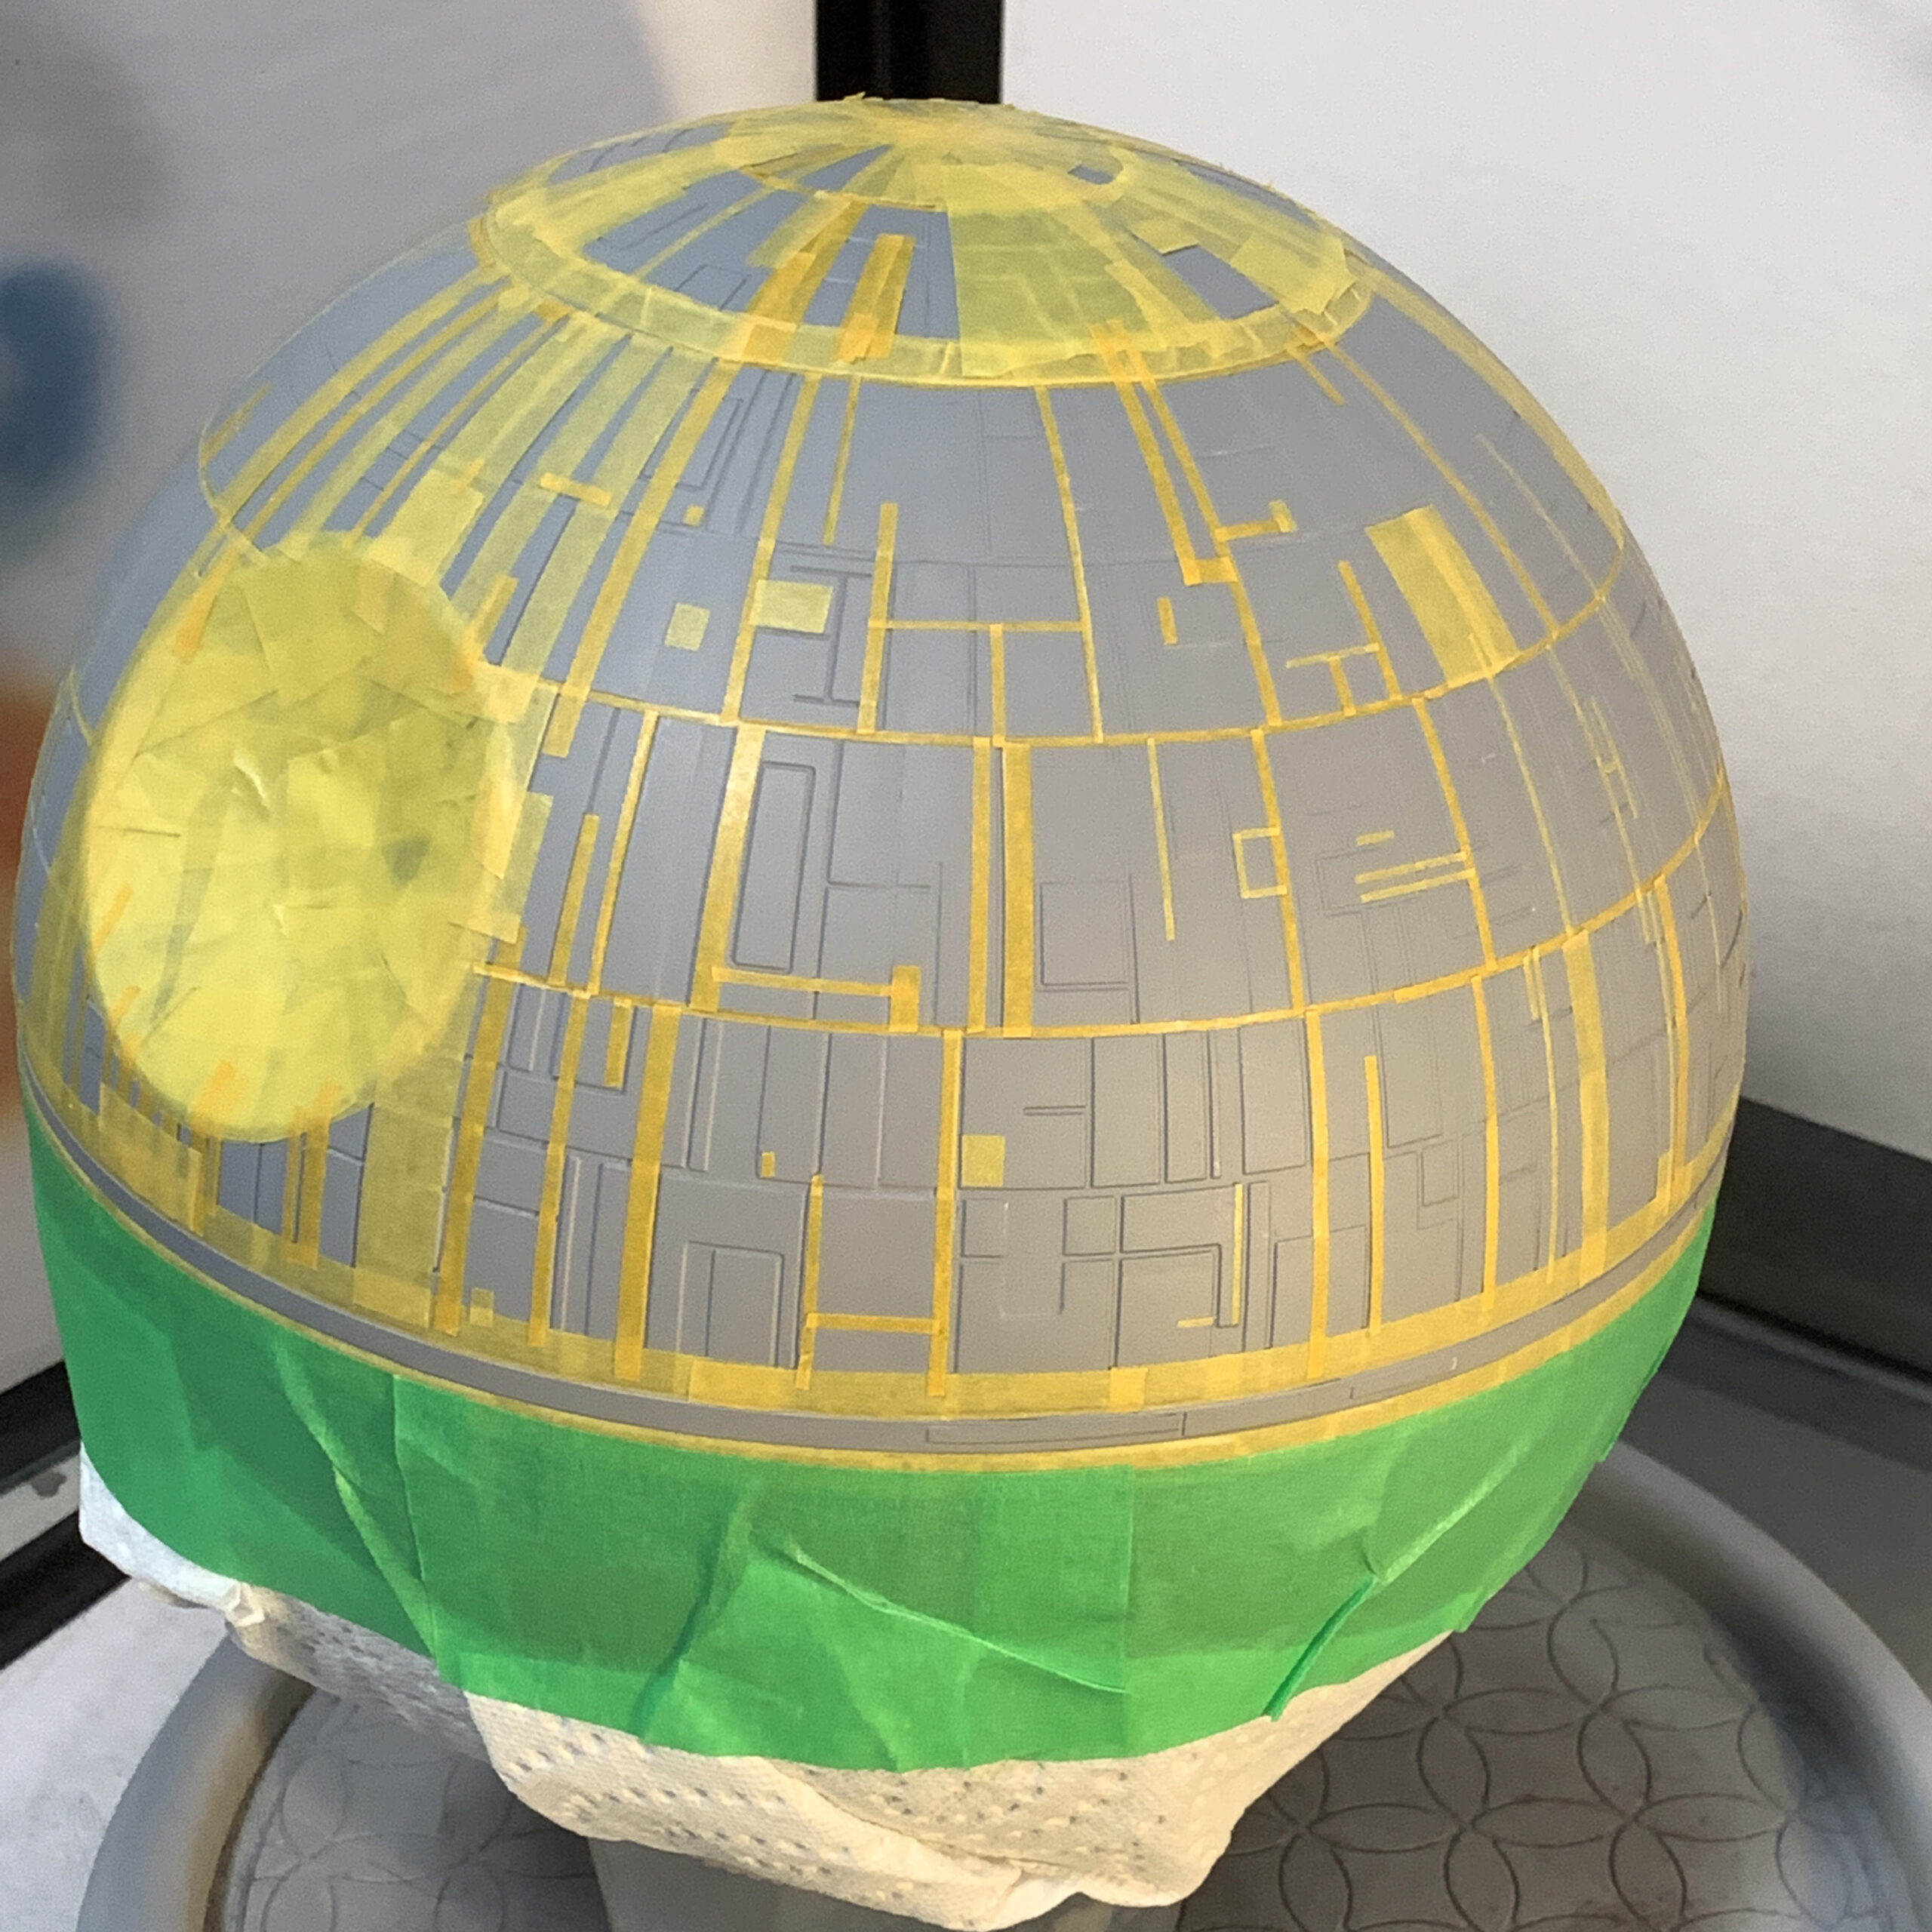
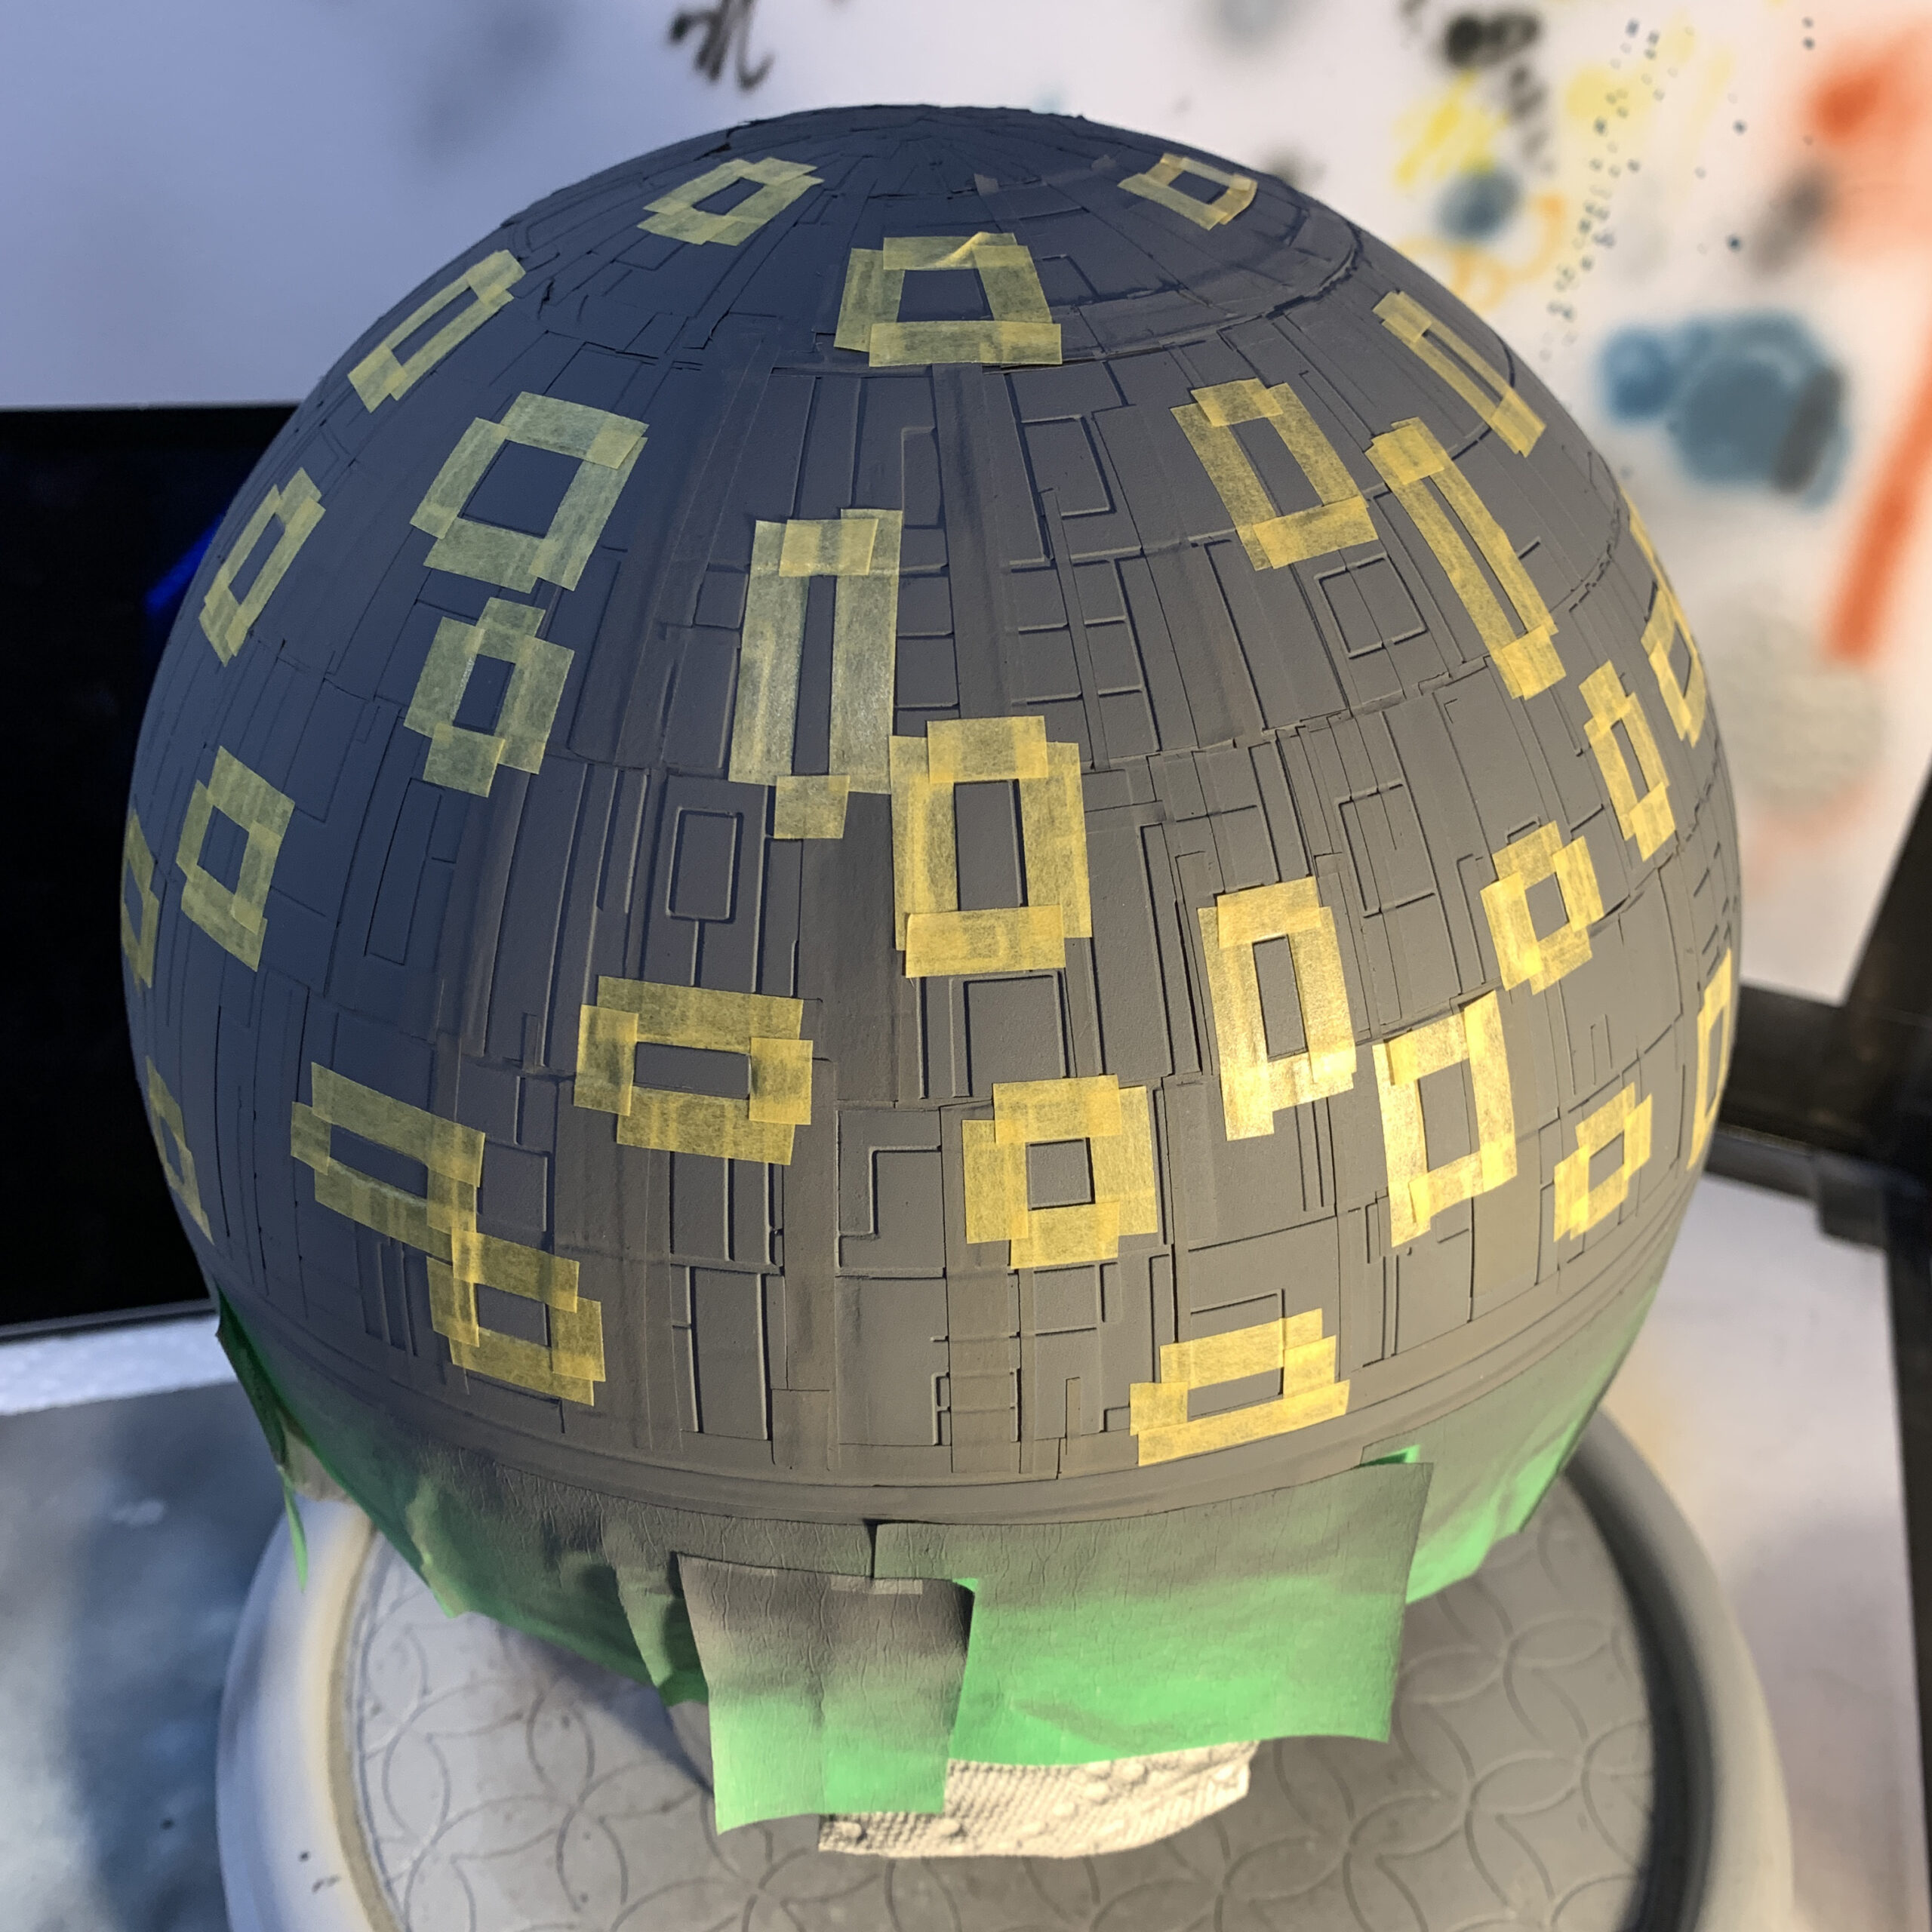
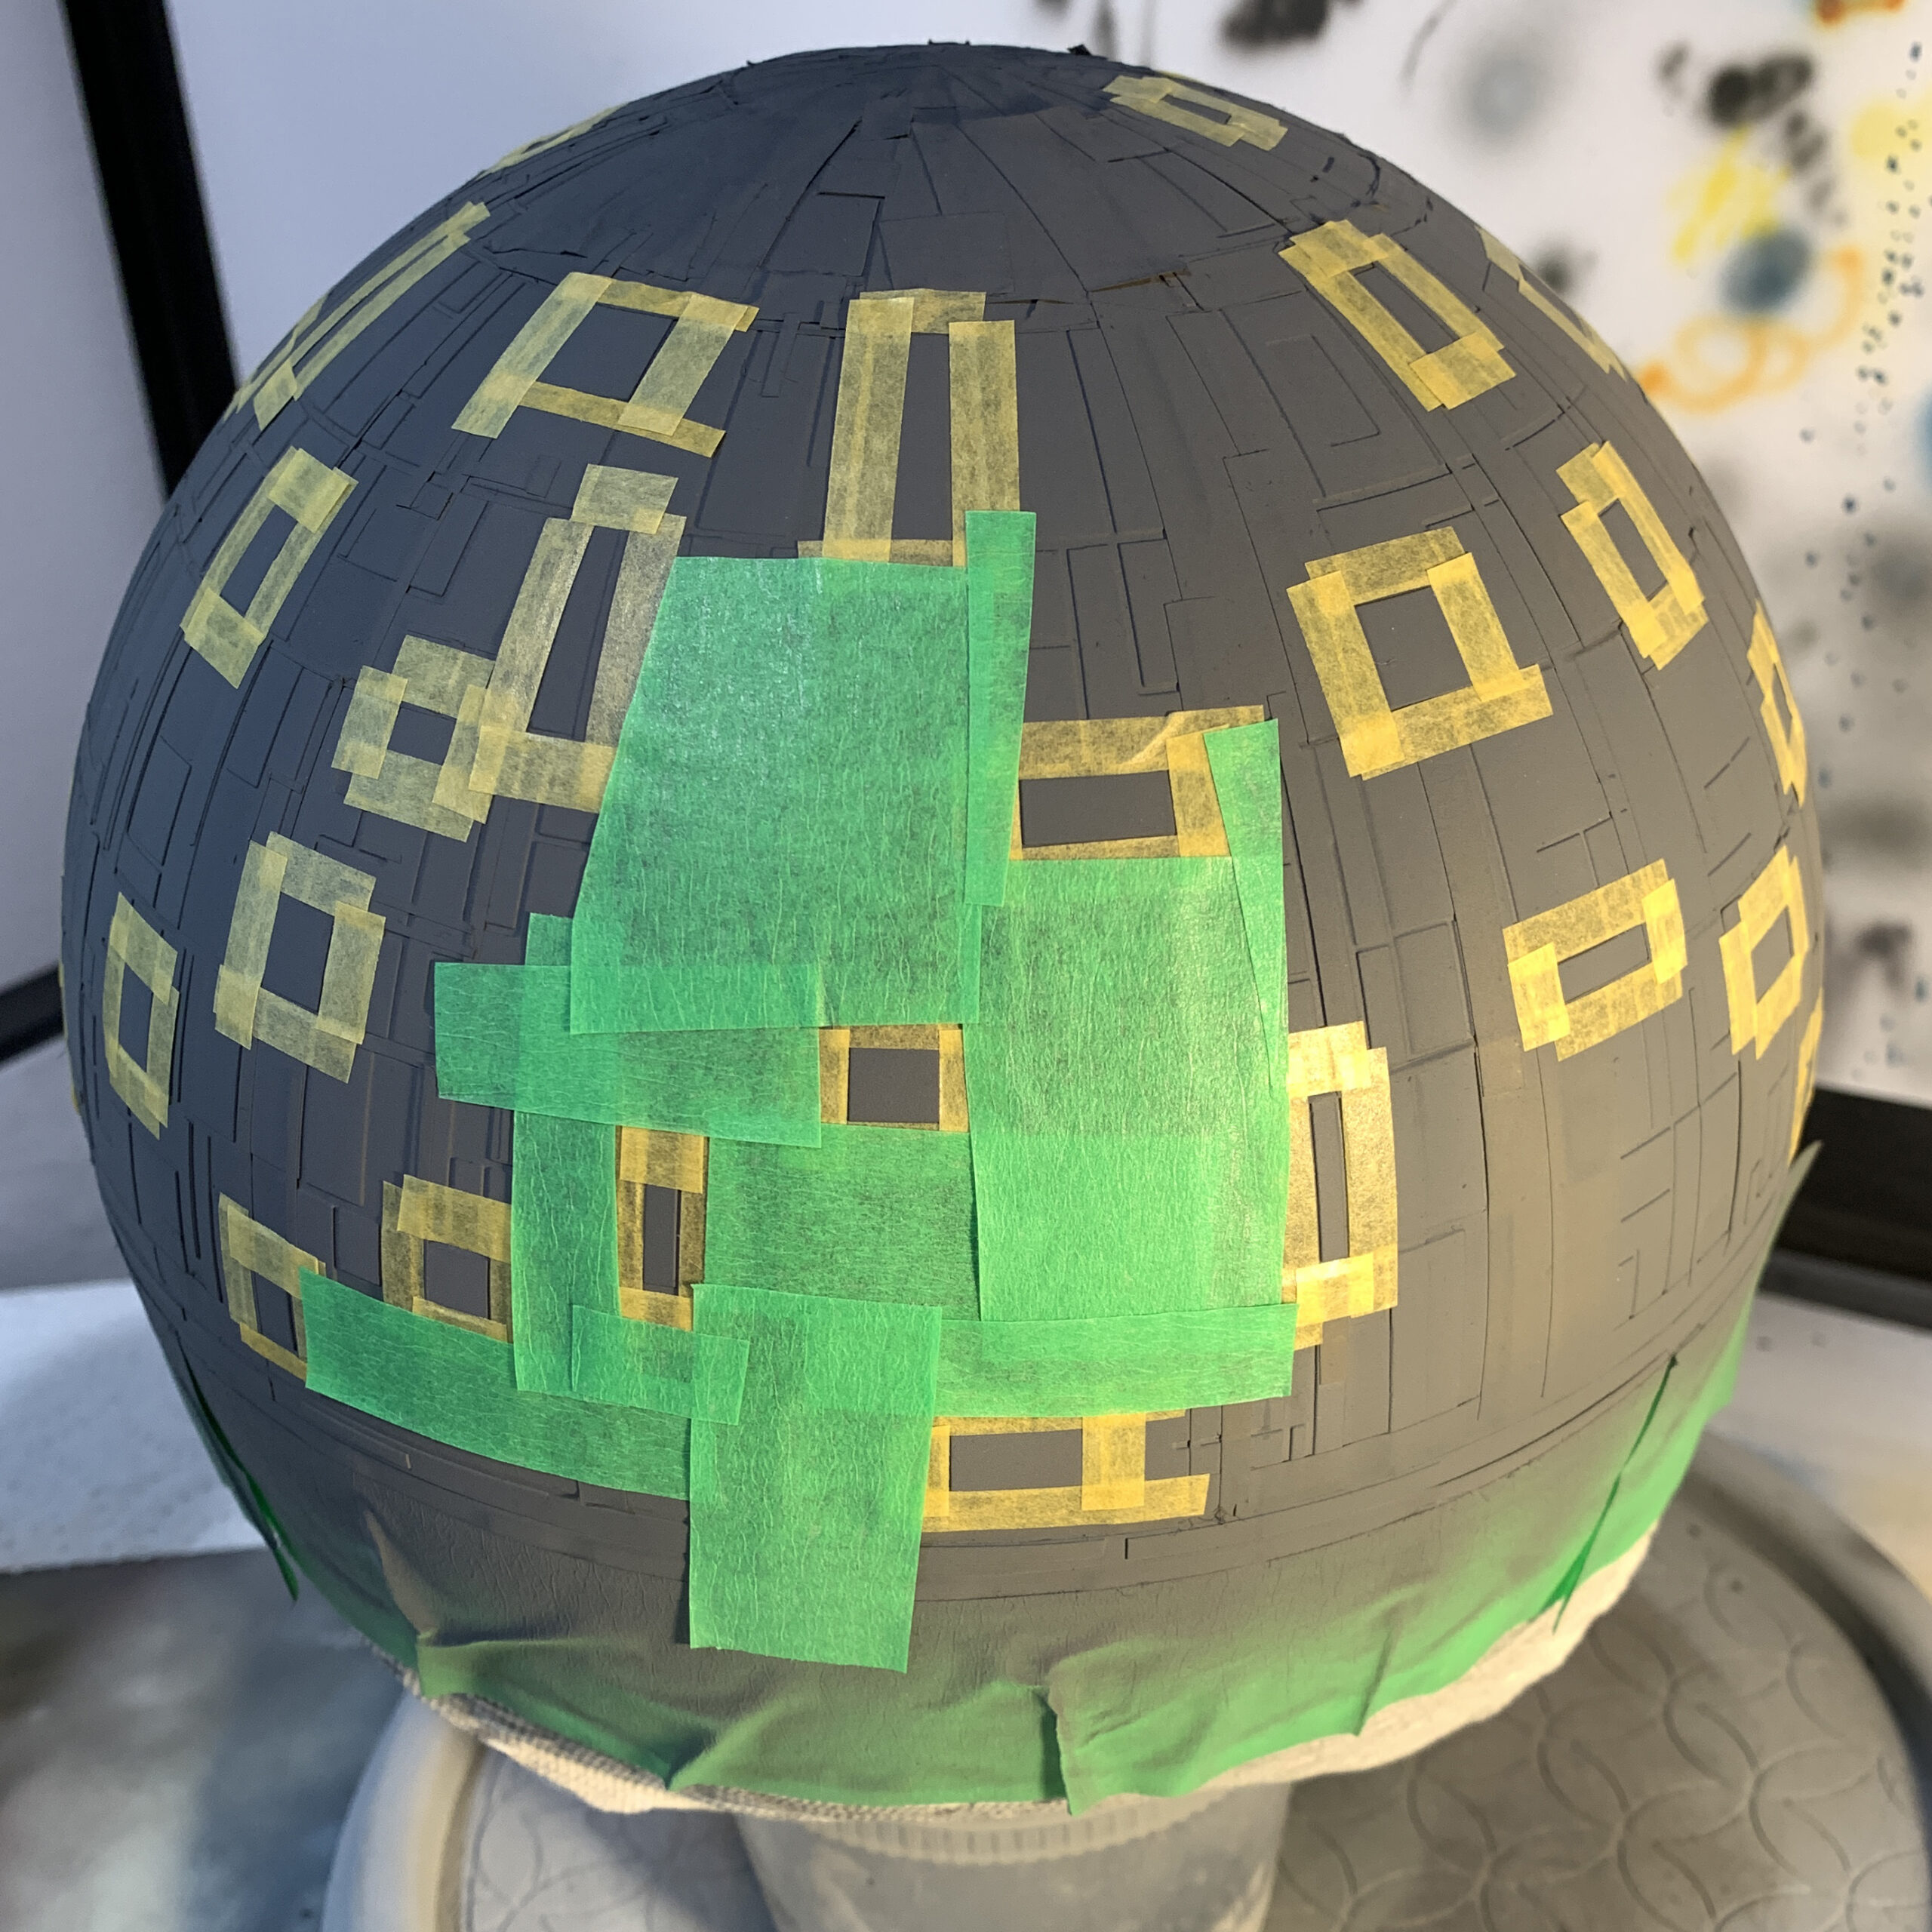
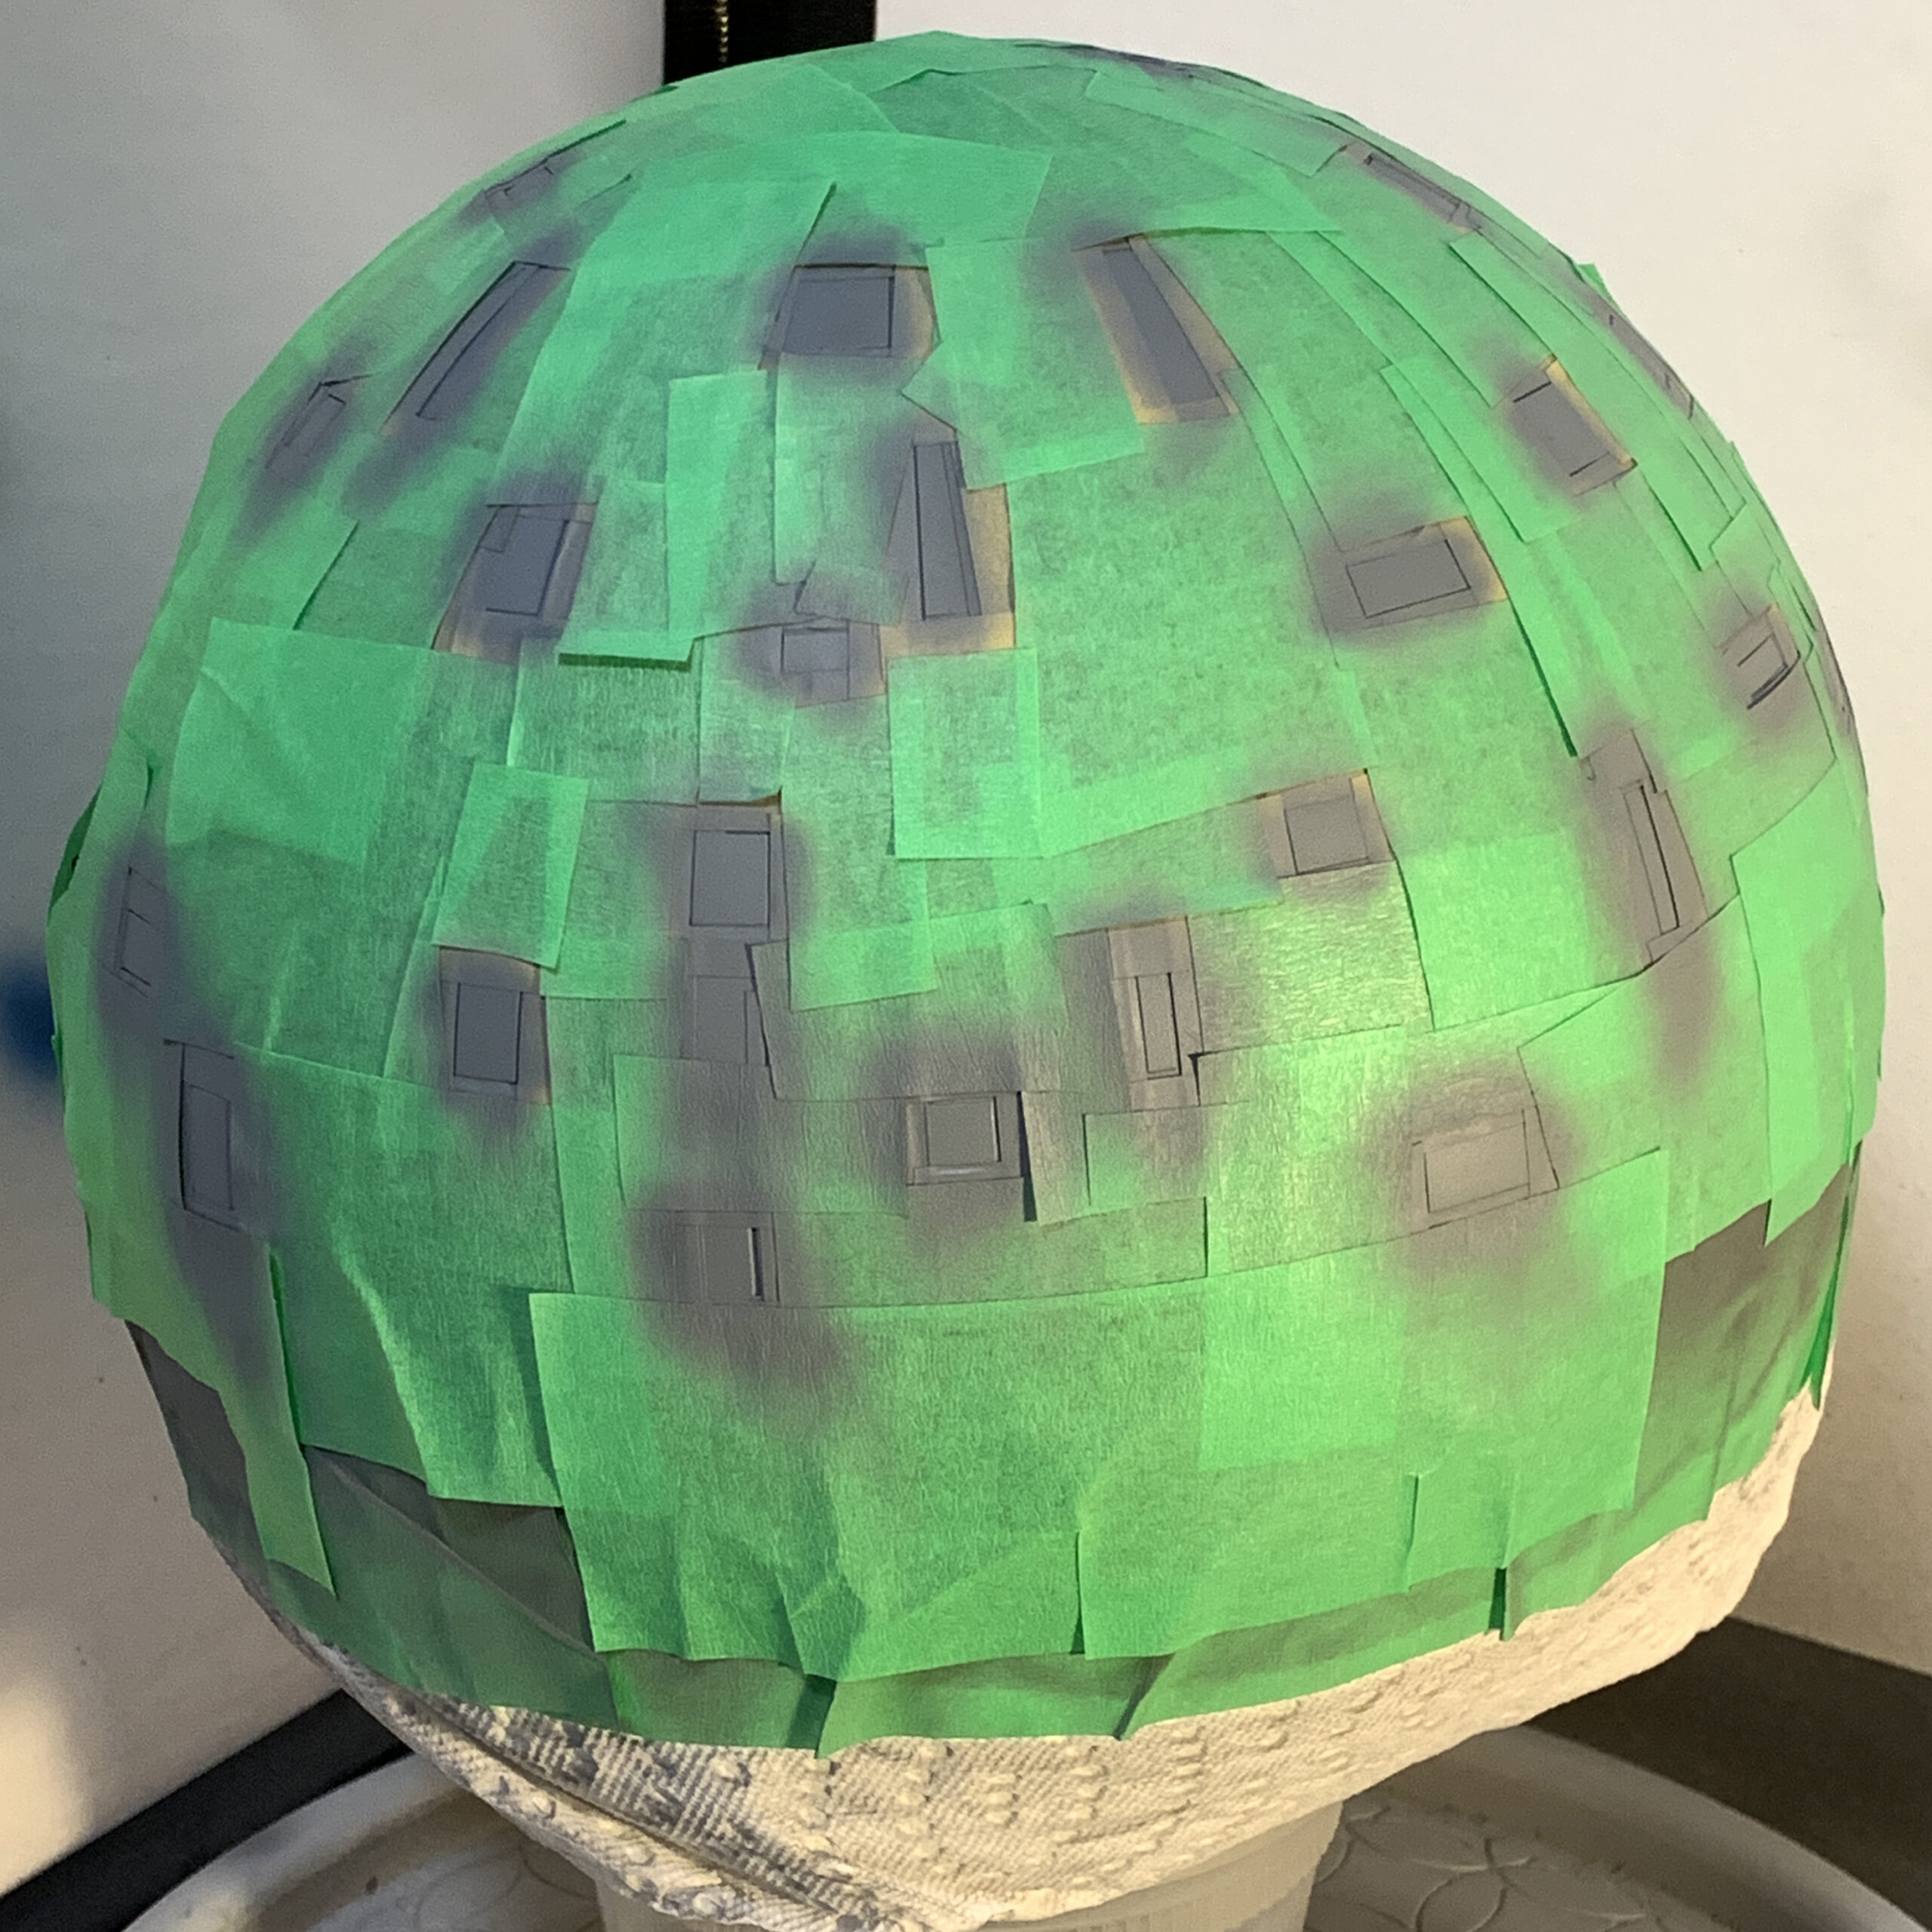
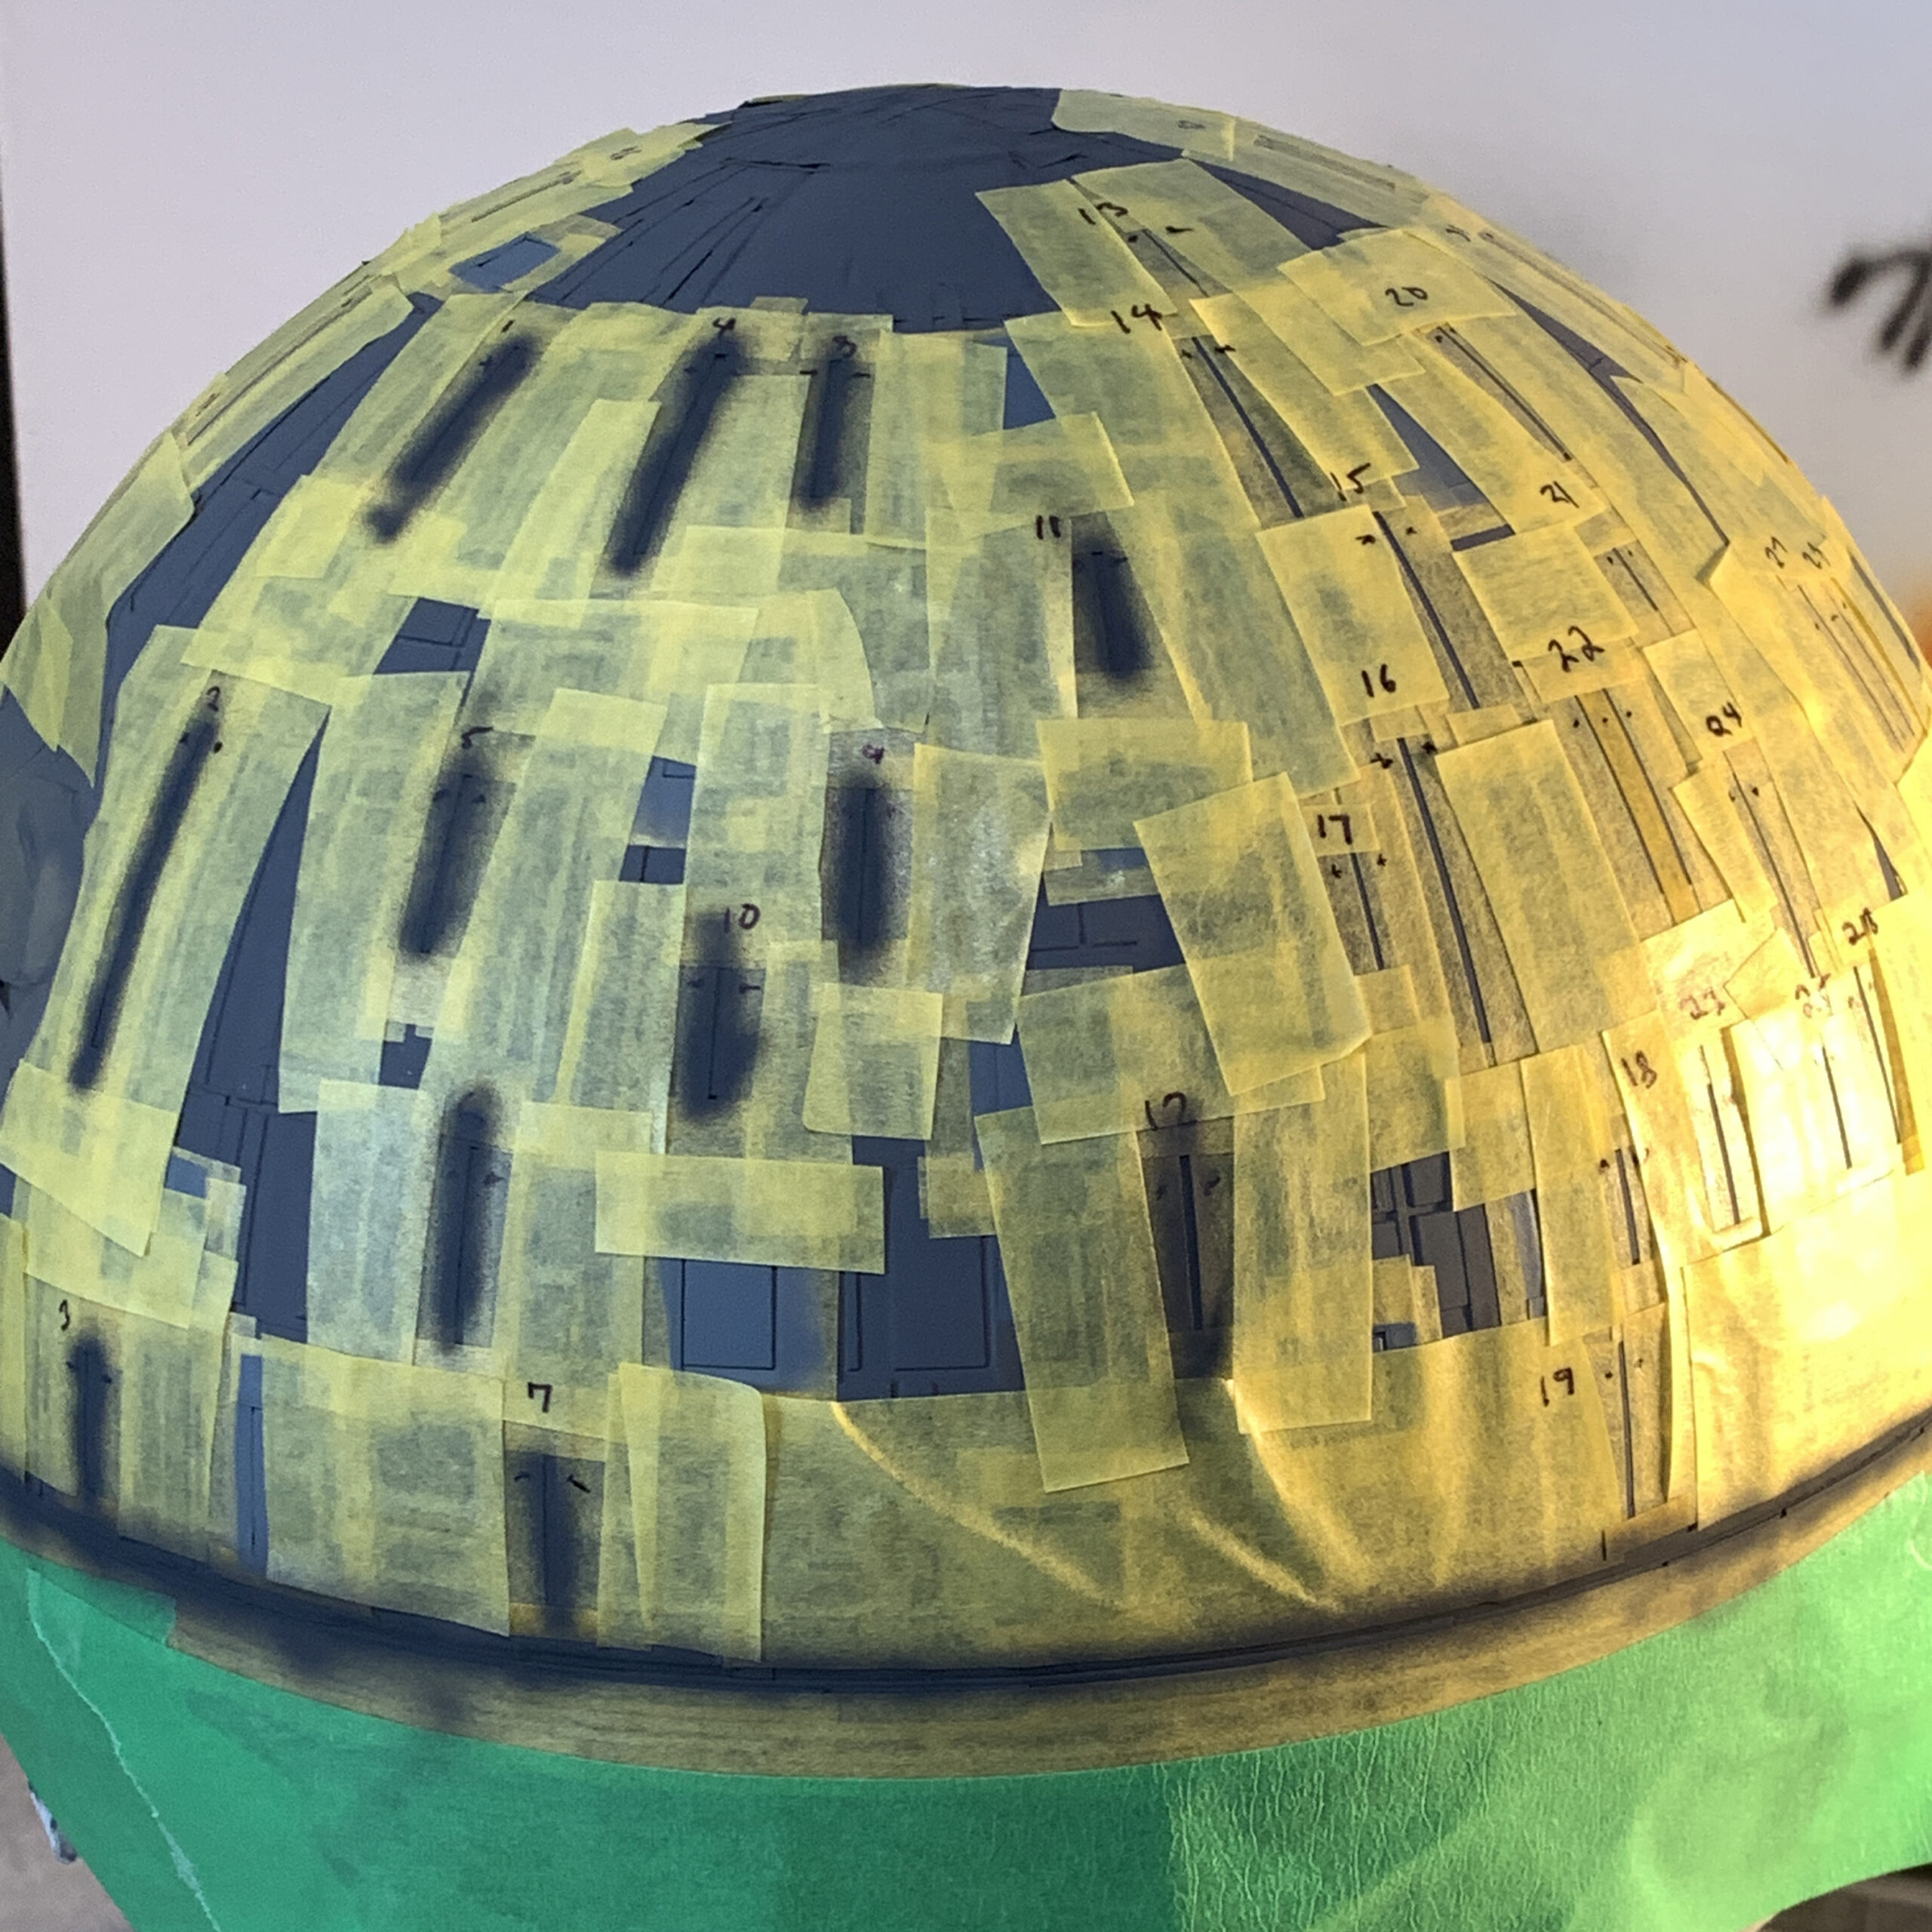
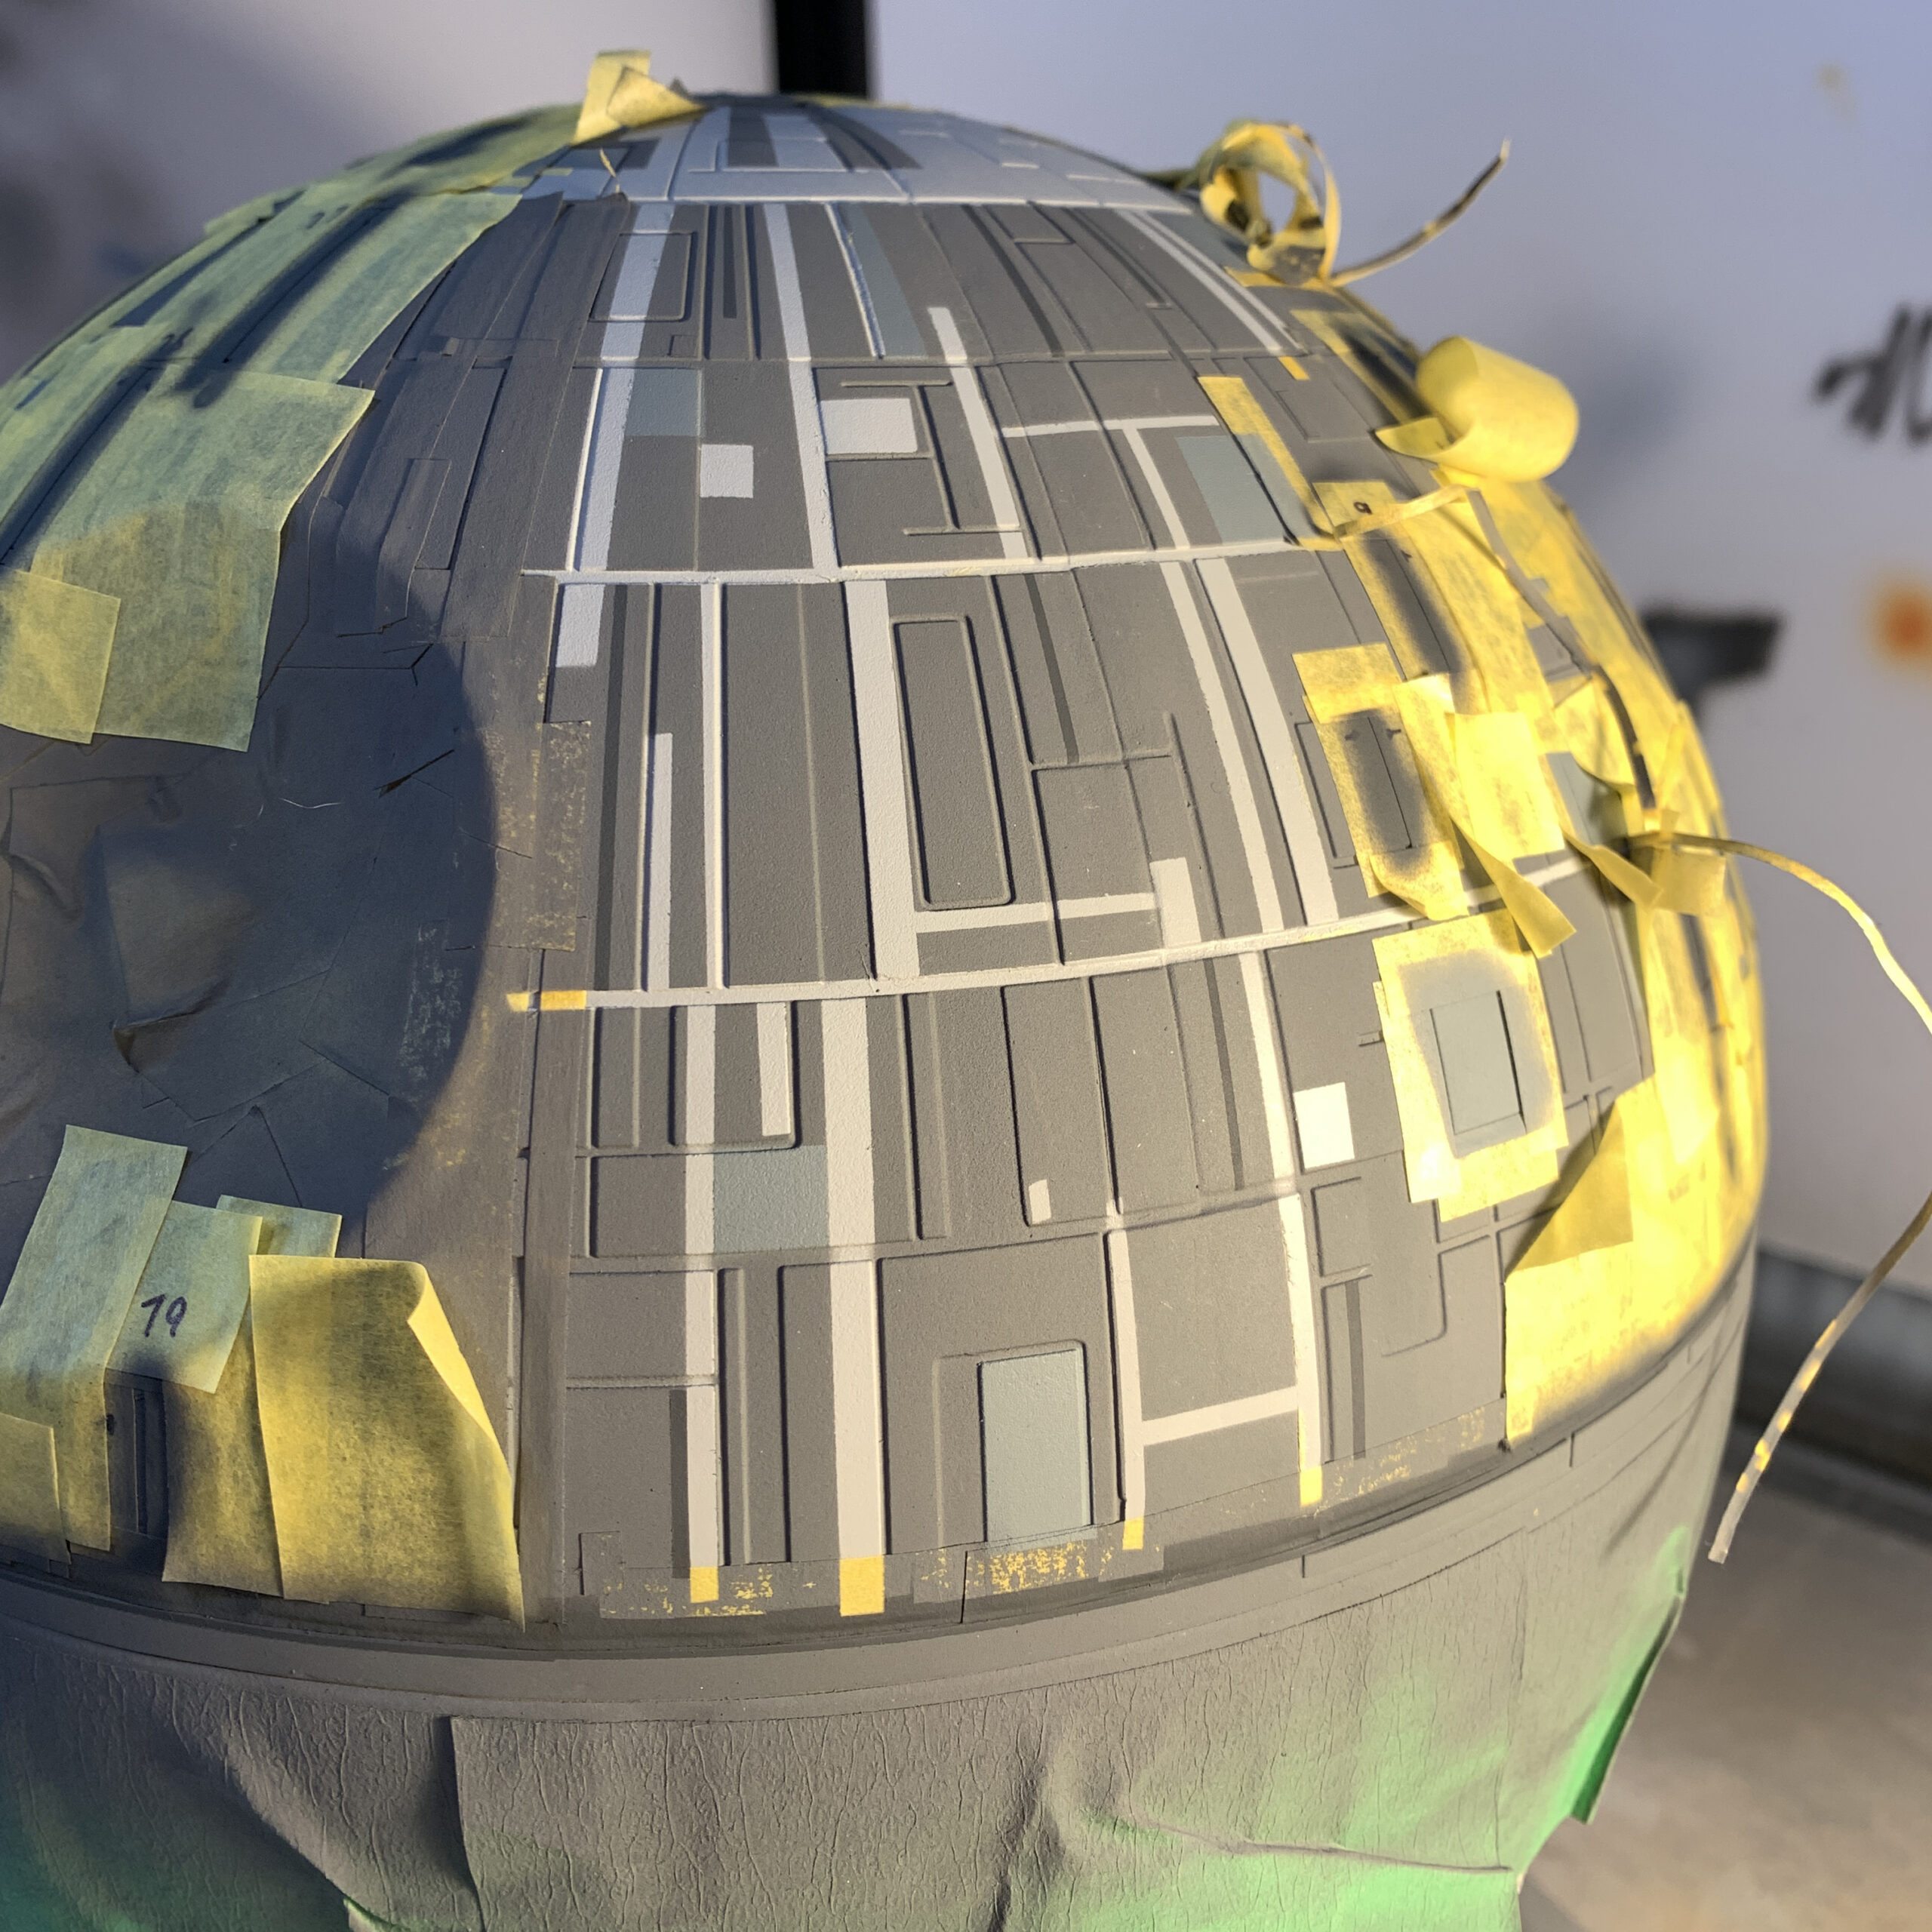
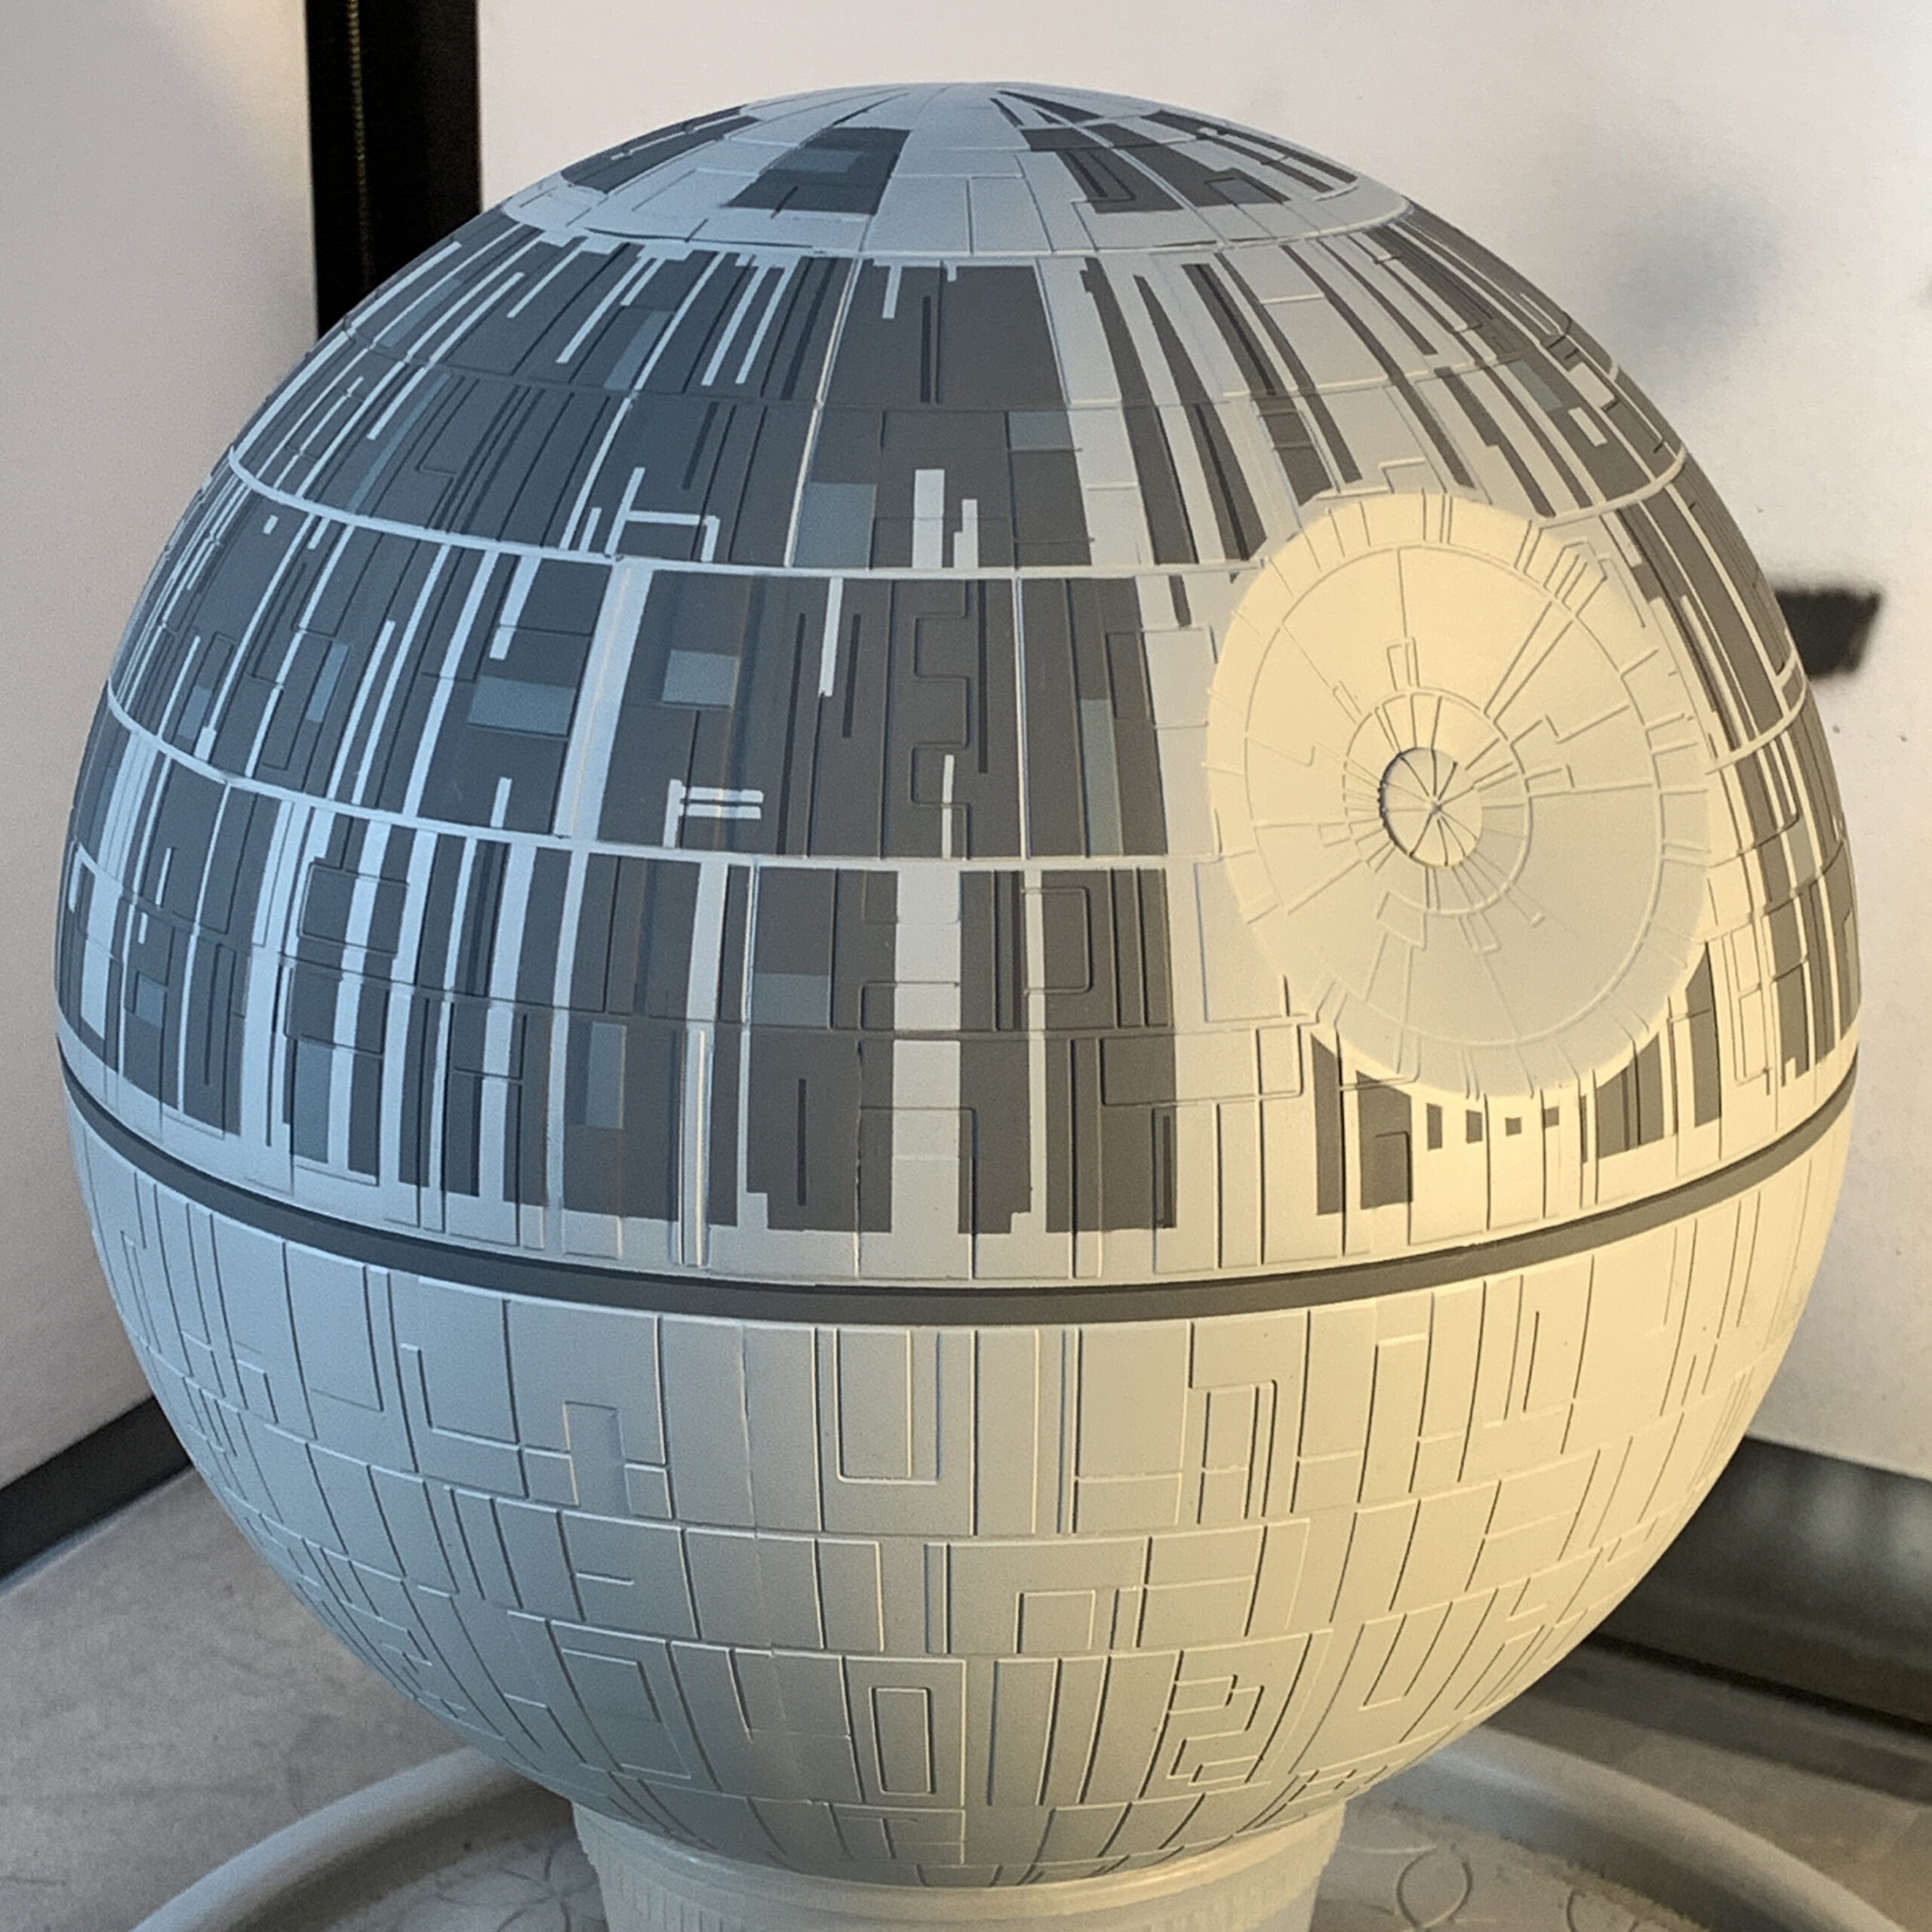
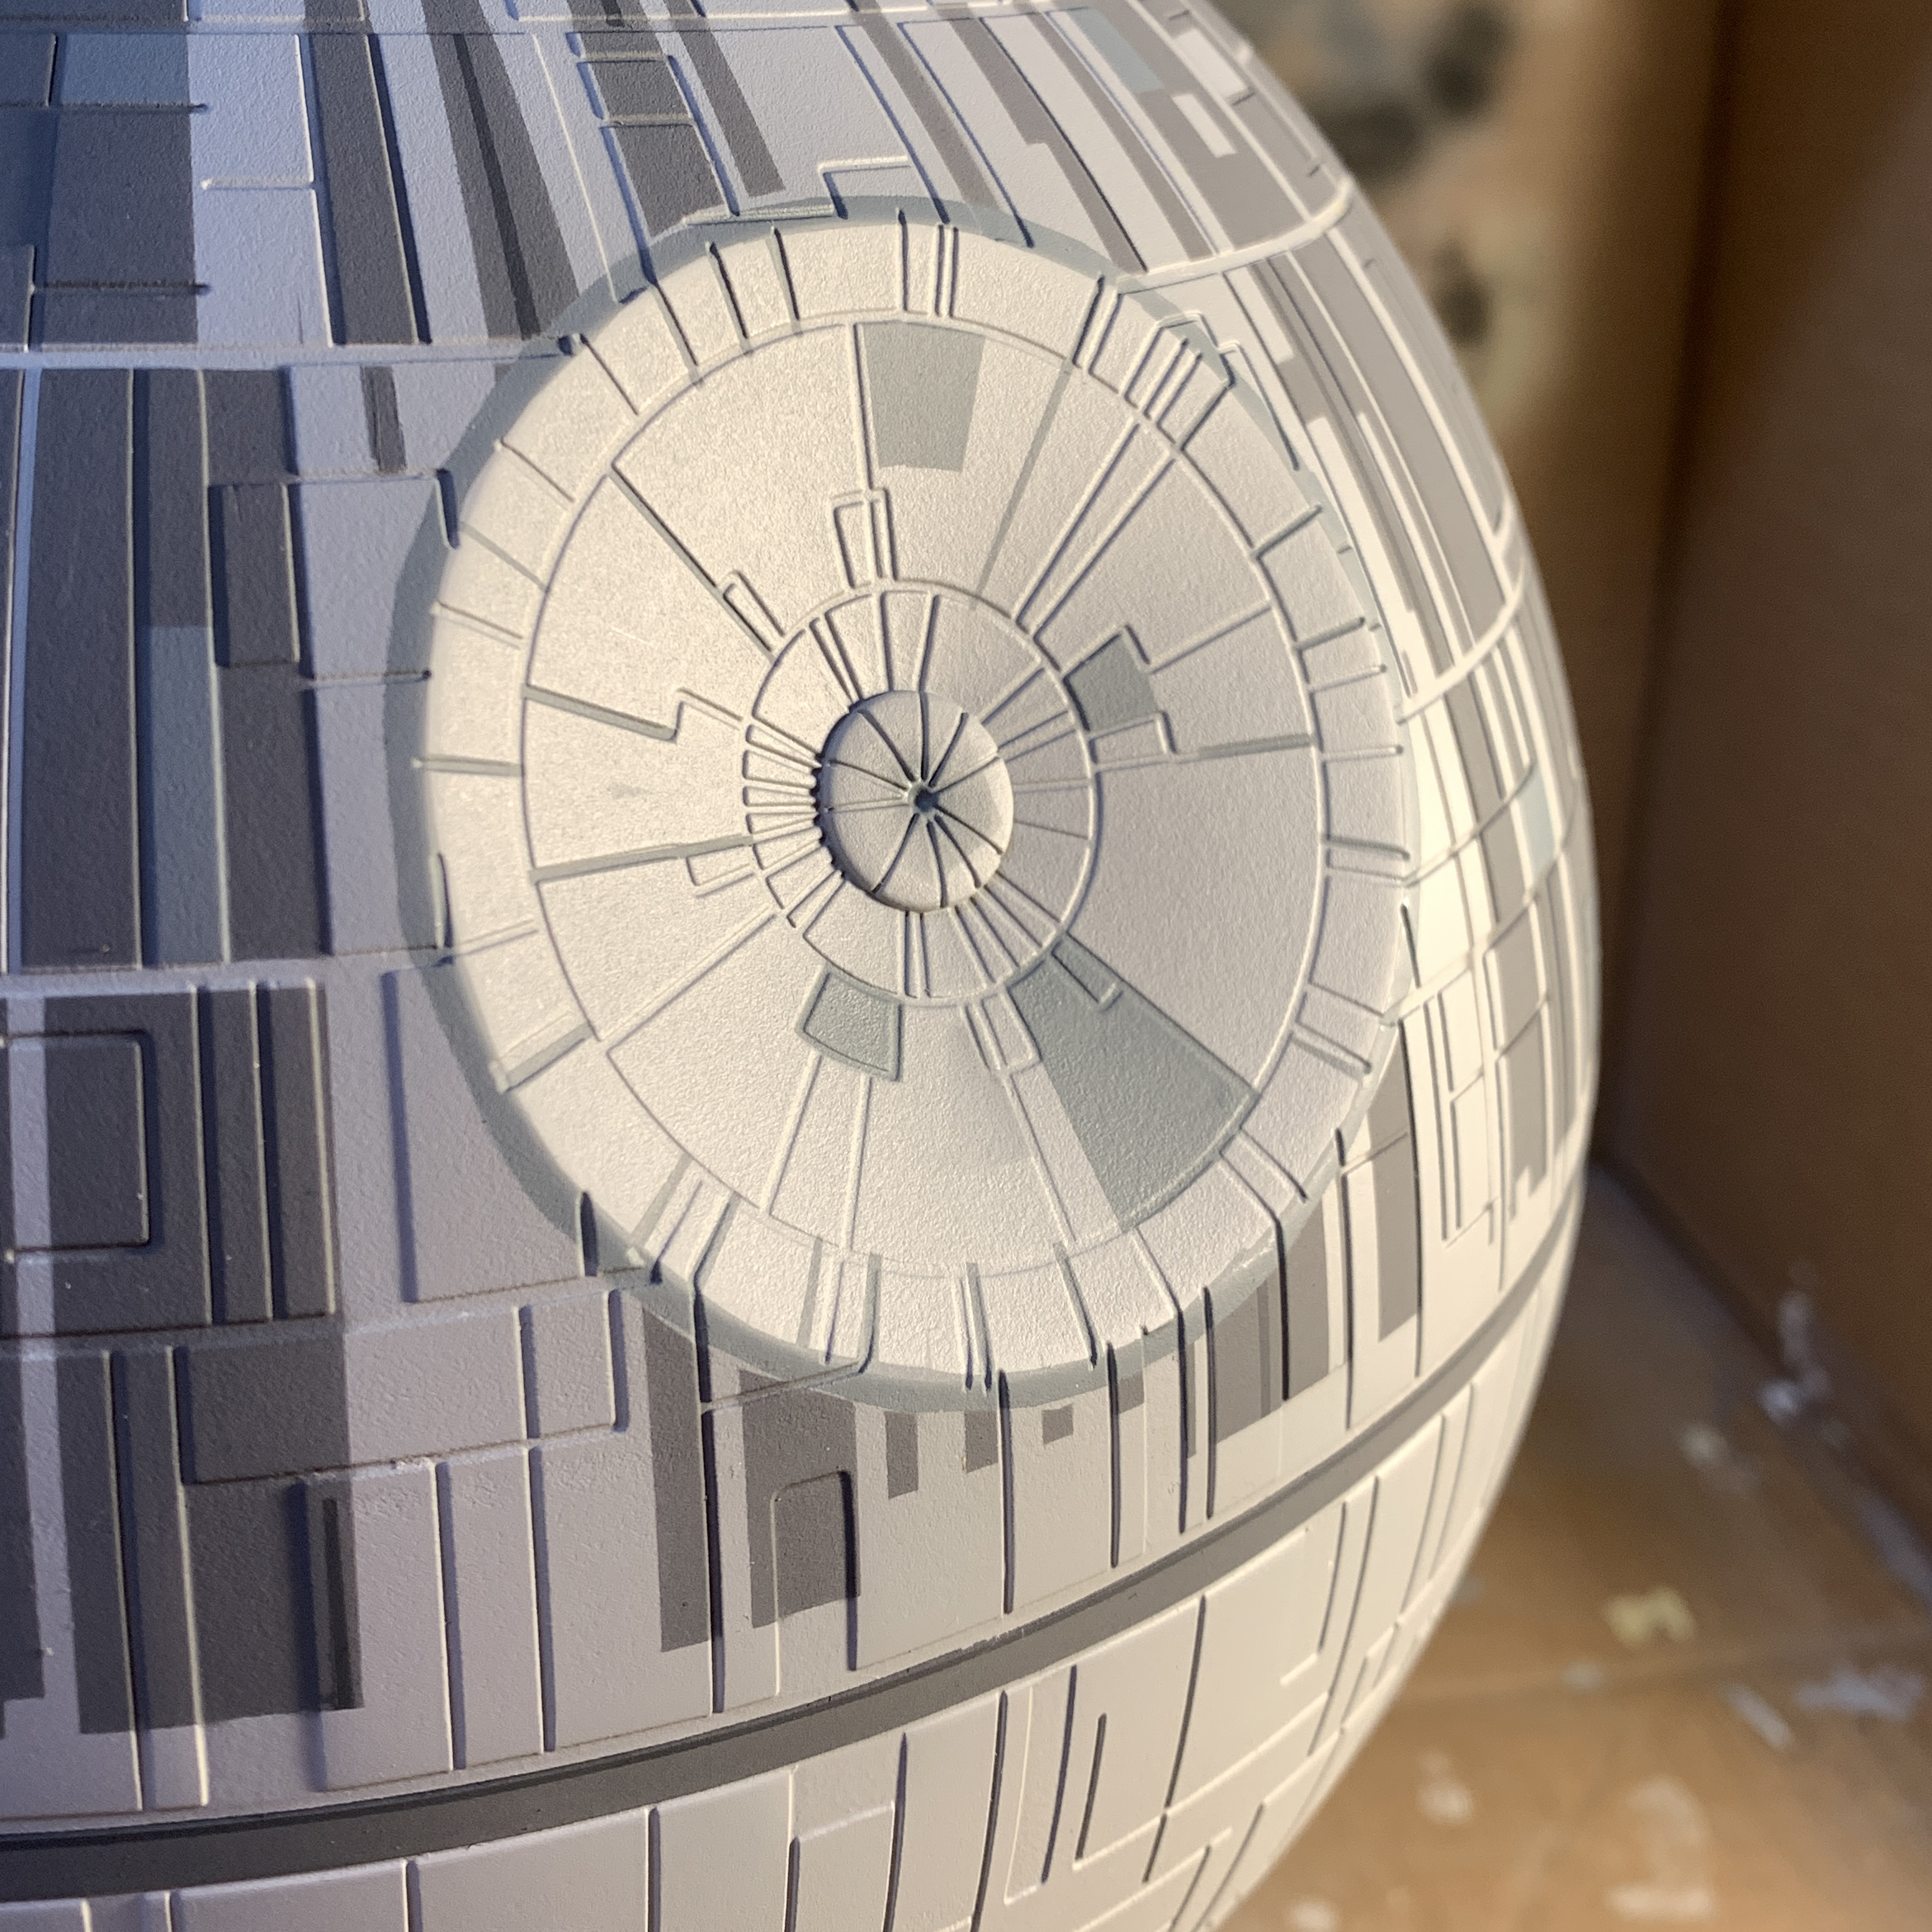
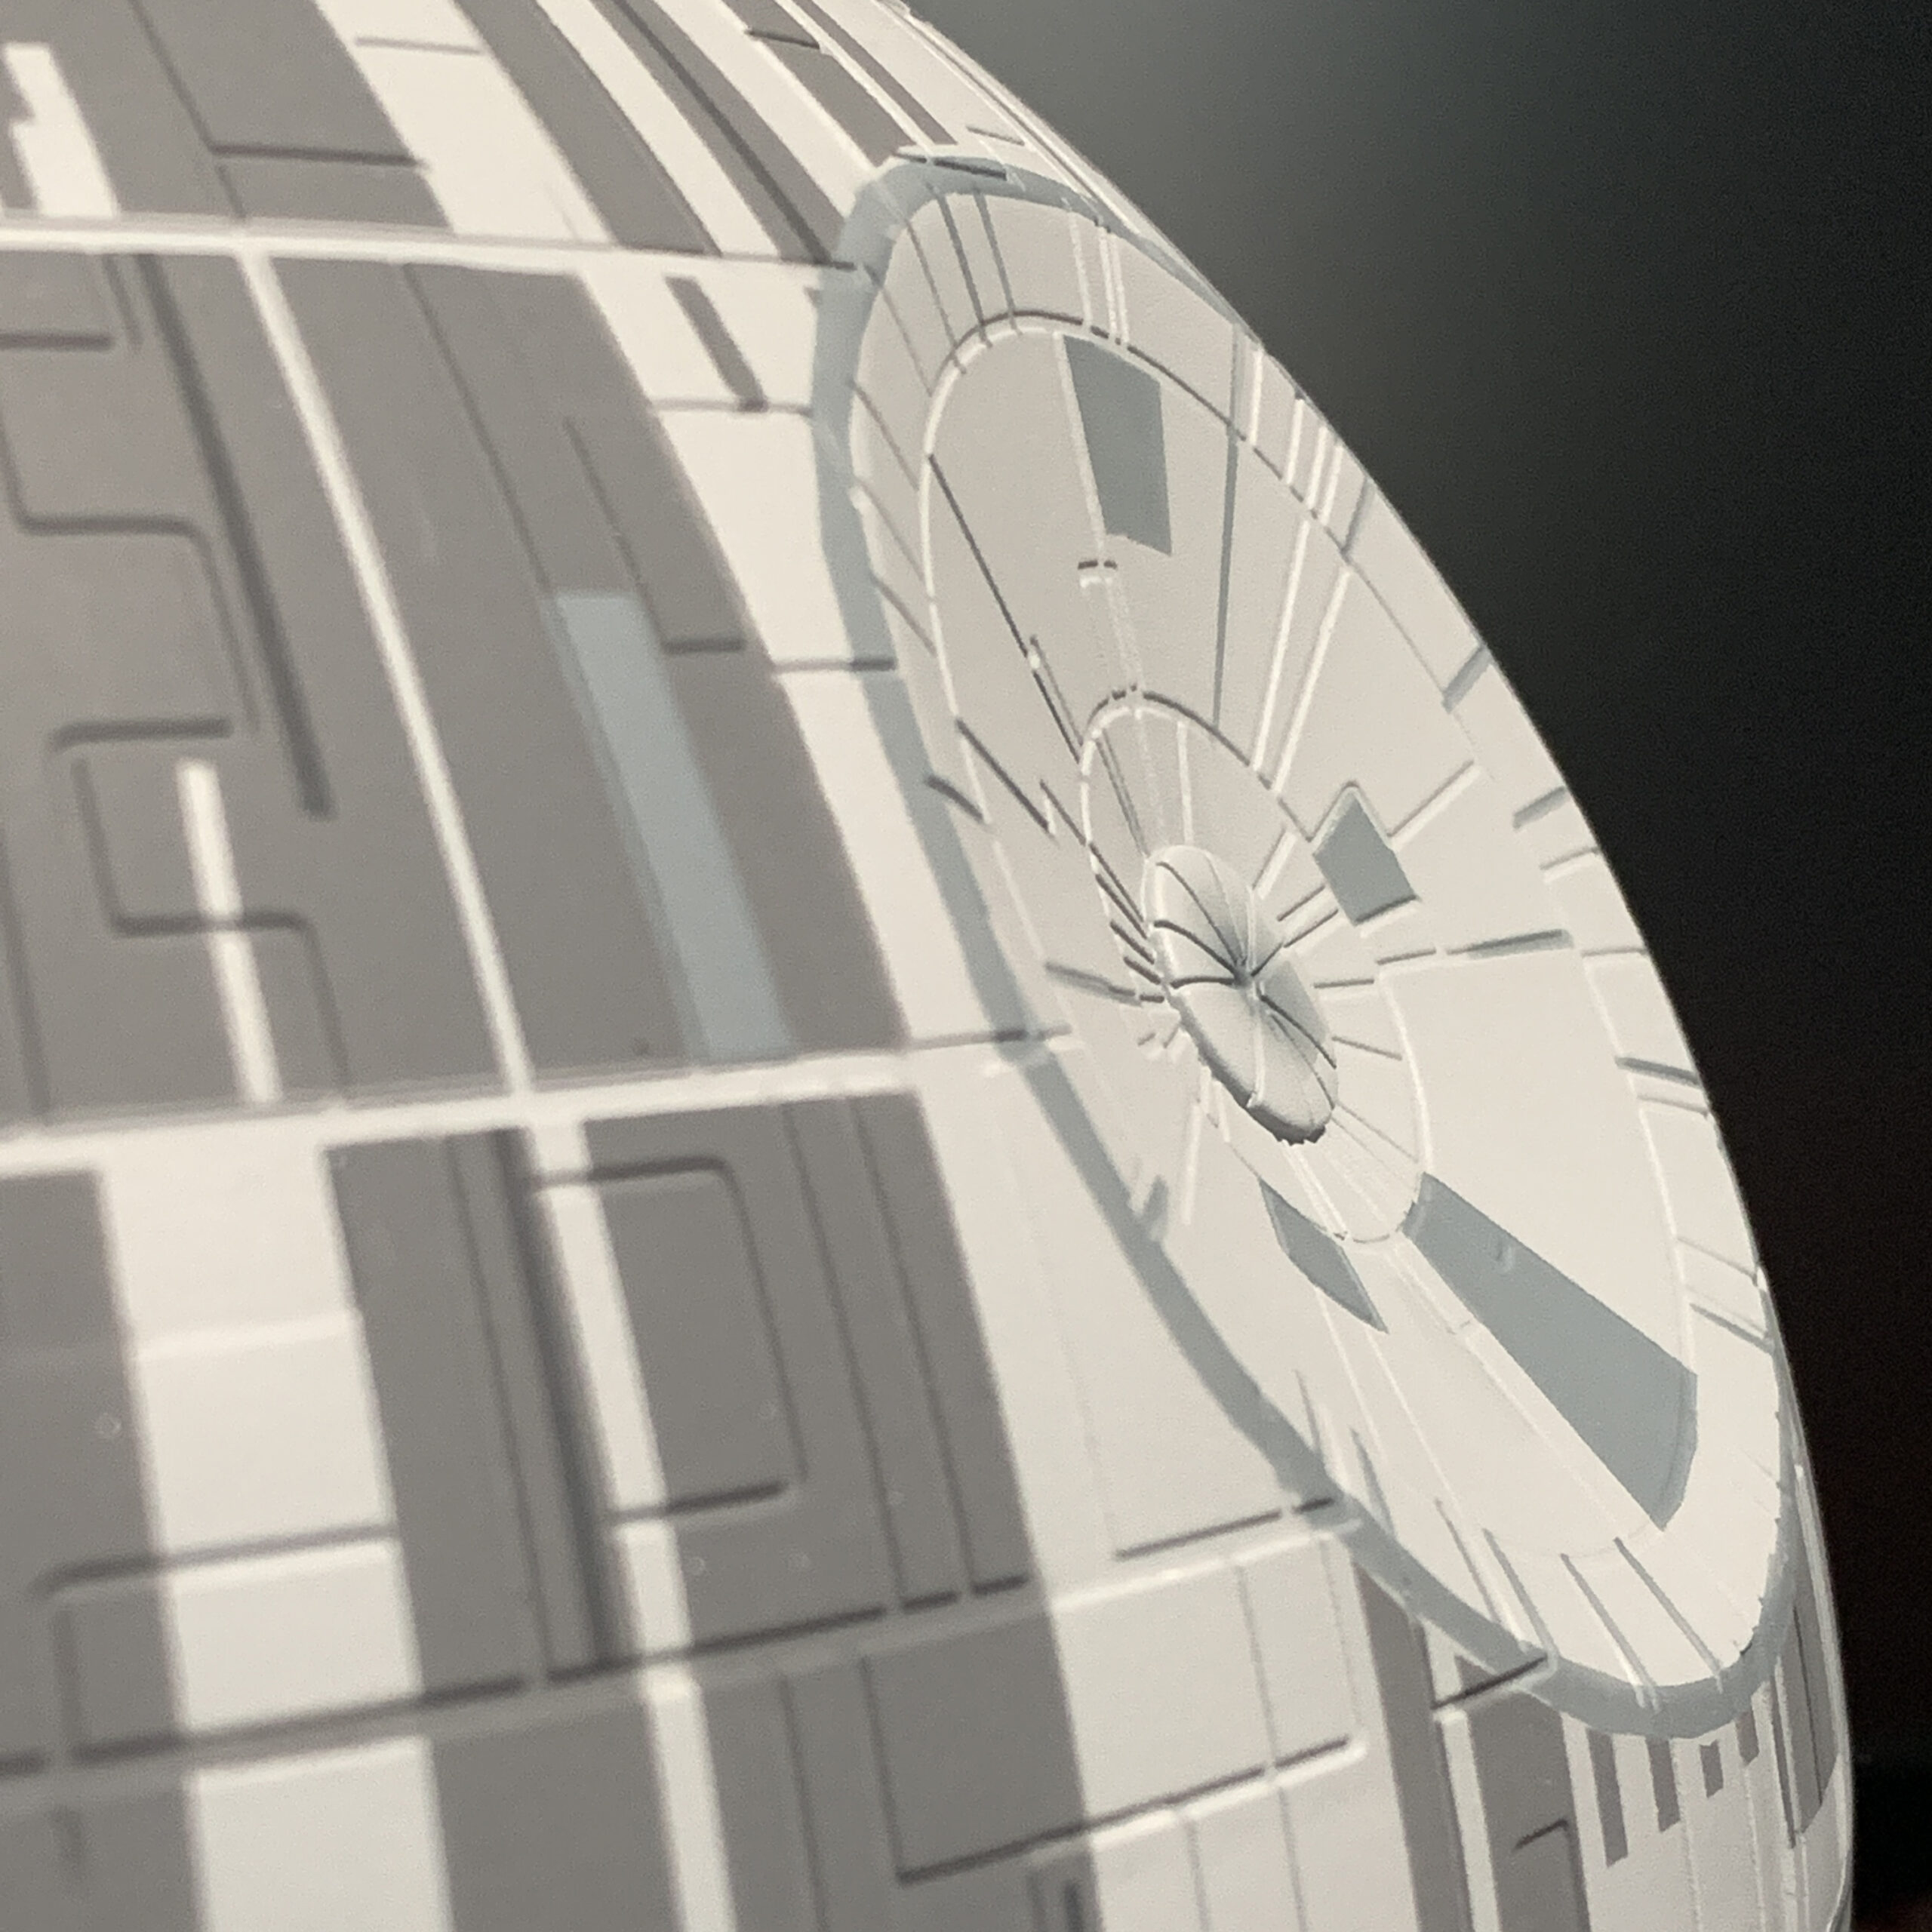
Painting the AMT-Ertl Death Star was the most time-consuming part of the Death Star Mobile project, but ultimately, the most rewarding. At this point I had fully built the kit, and primed it with Tamiya light grey primer; ultimately I decided that grey would be a good choice for the initial base coat. That meant I needed three additional layers of grey: A dark grey for the large surface areas, a medium grey for the smaller surface tiles on top of that, and a really dark grey for additional strips on top of that.
So the first layer would have to be masked off with tape, airbrushed, and then the next layer masked off, airbrushed… etc. Using reference photos I tried to keep the shape of surface patterns as accurate as I could.
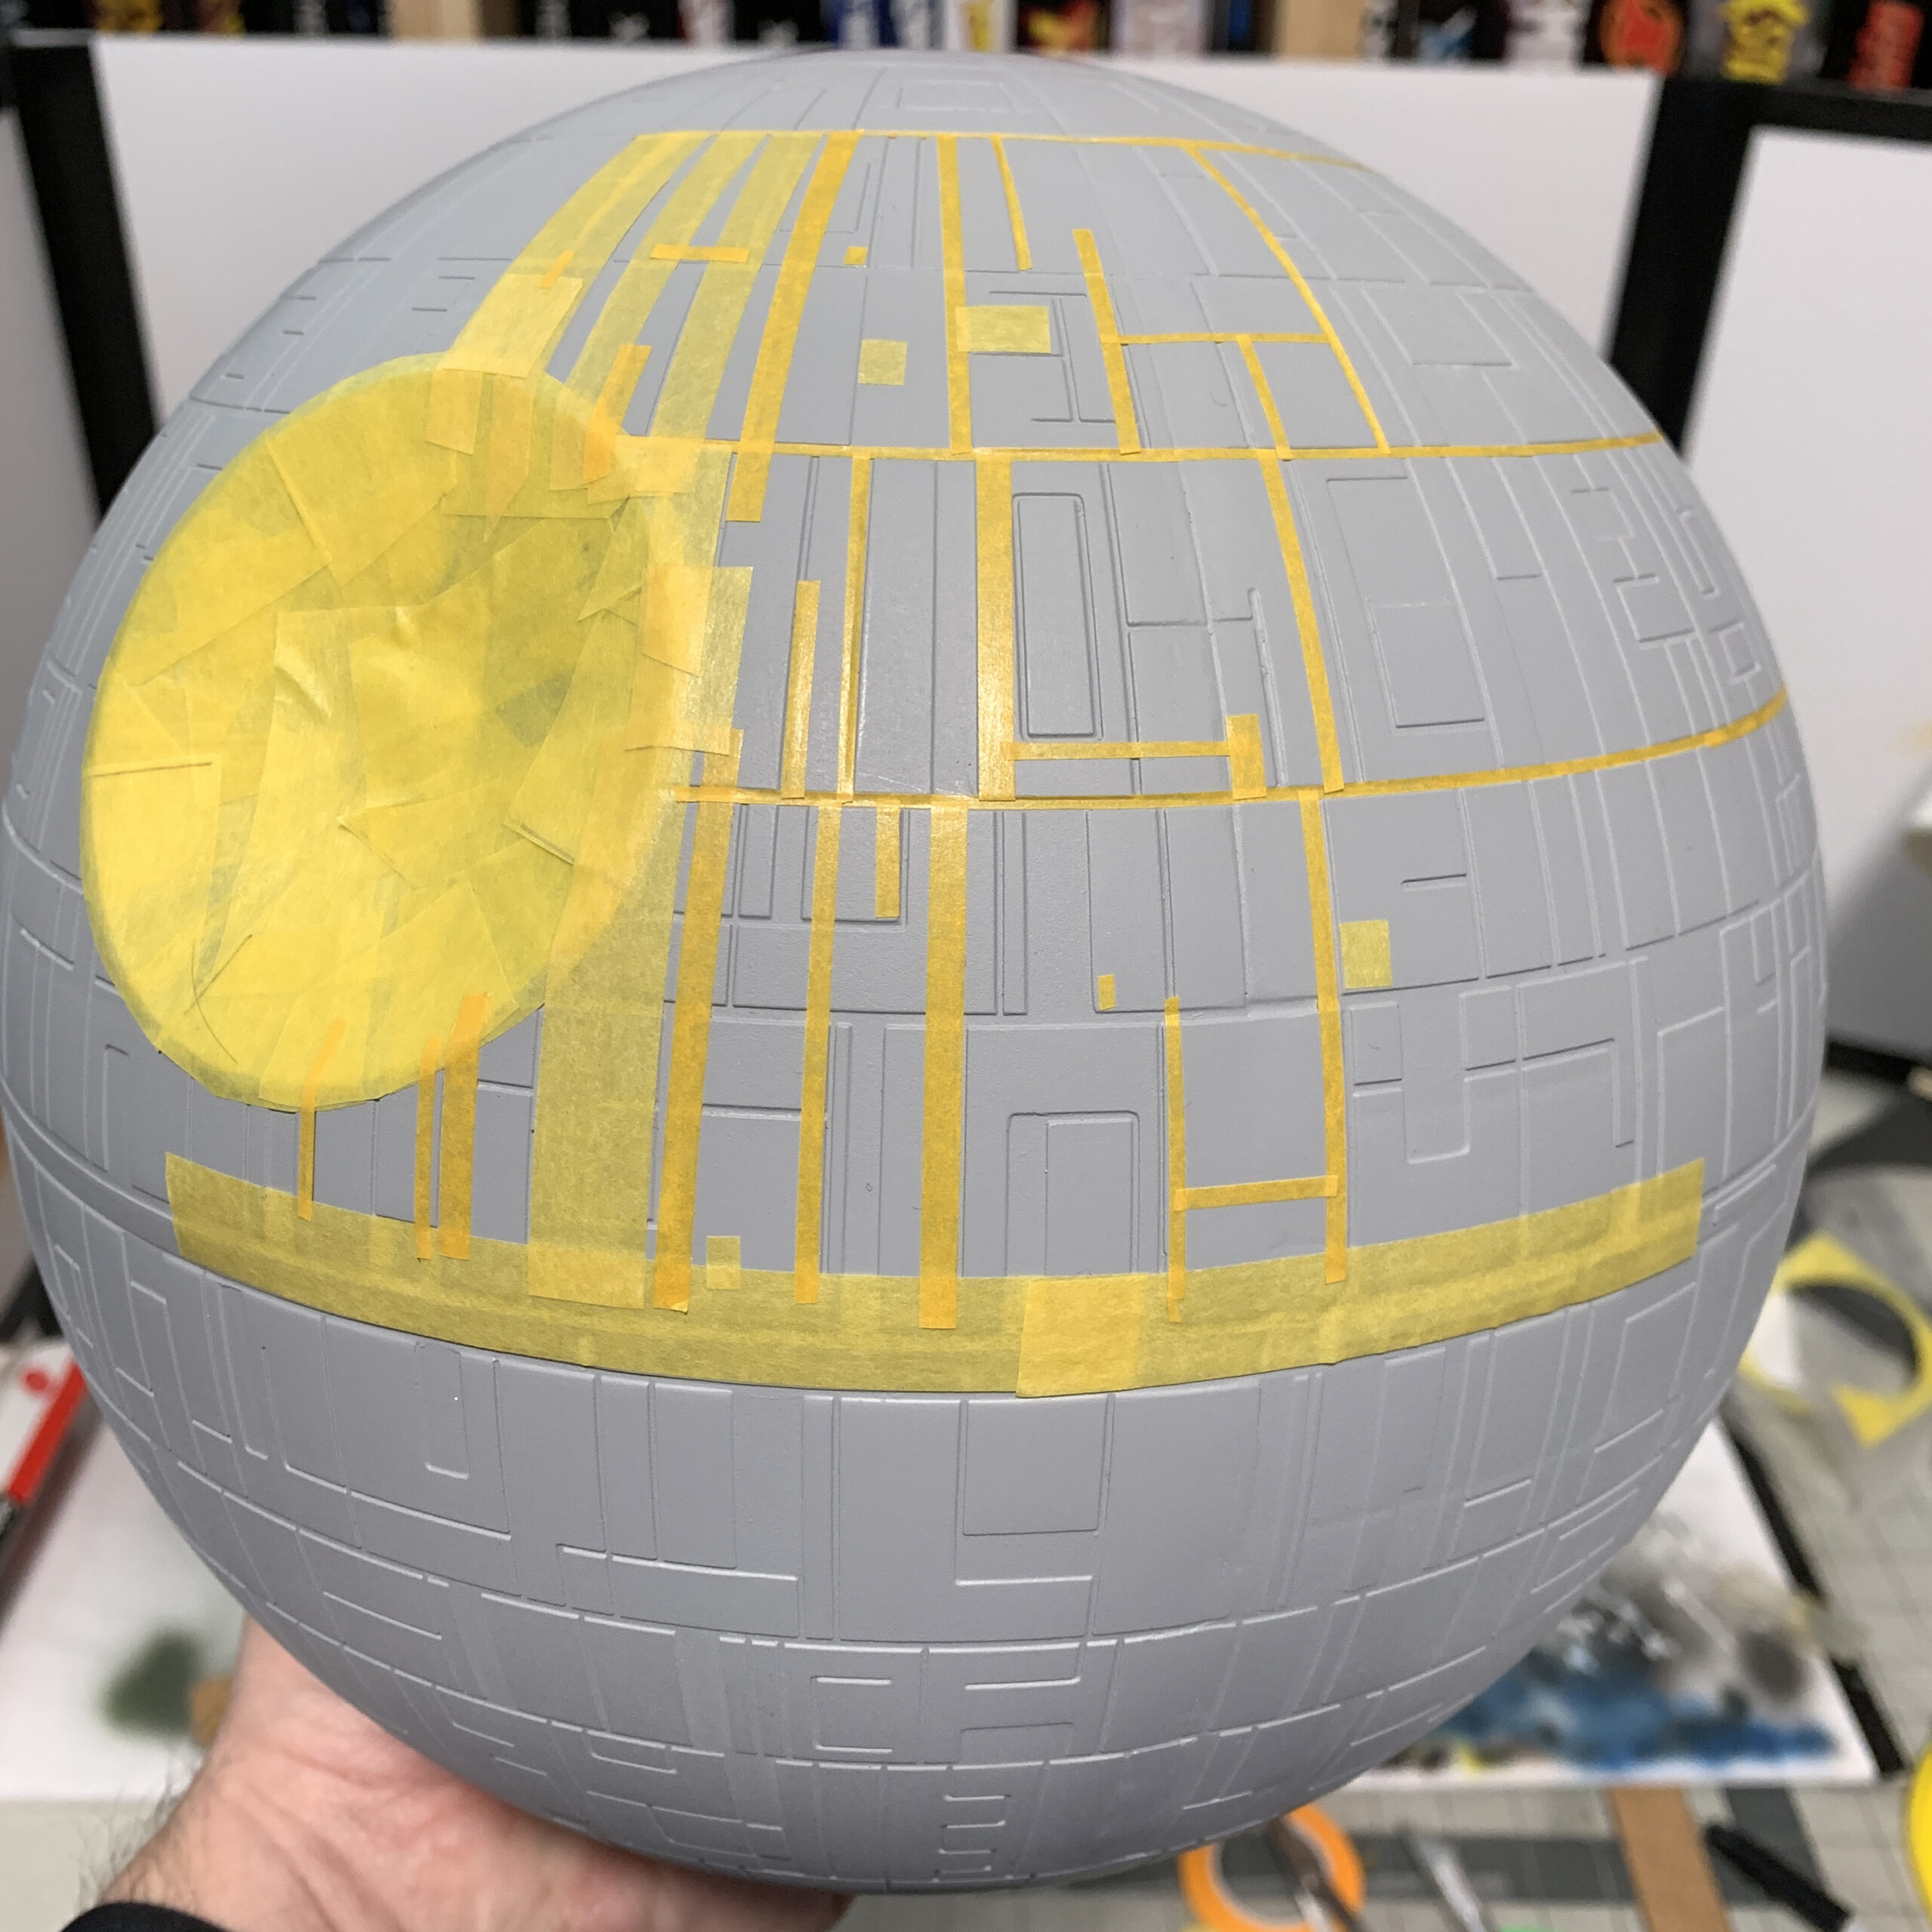
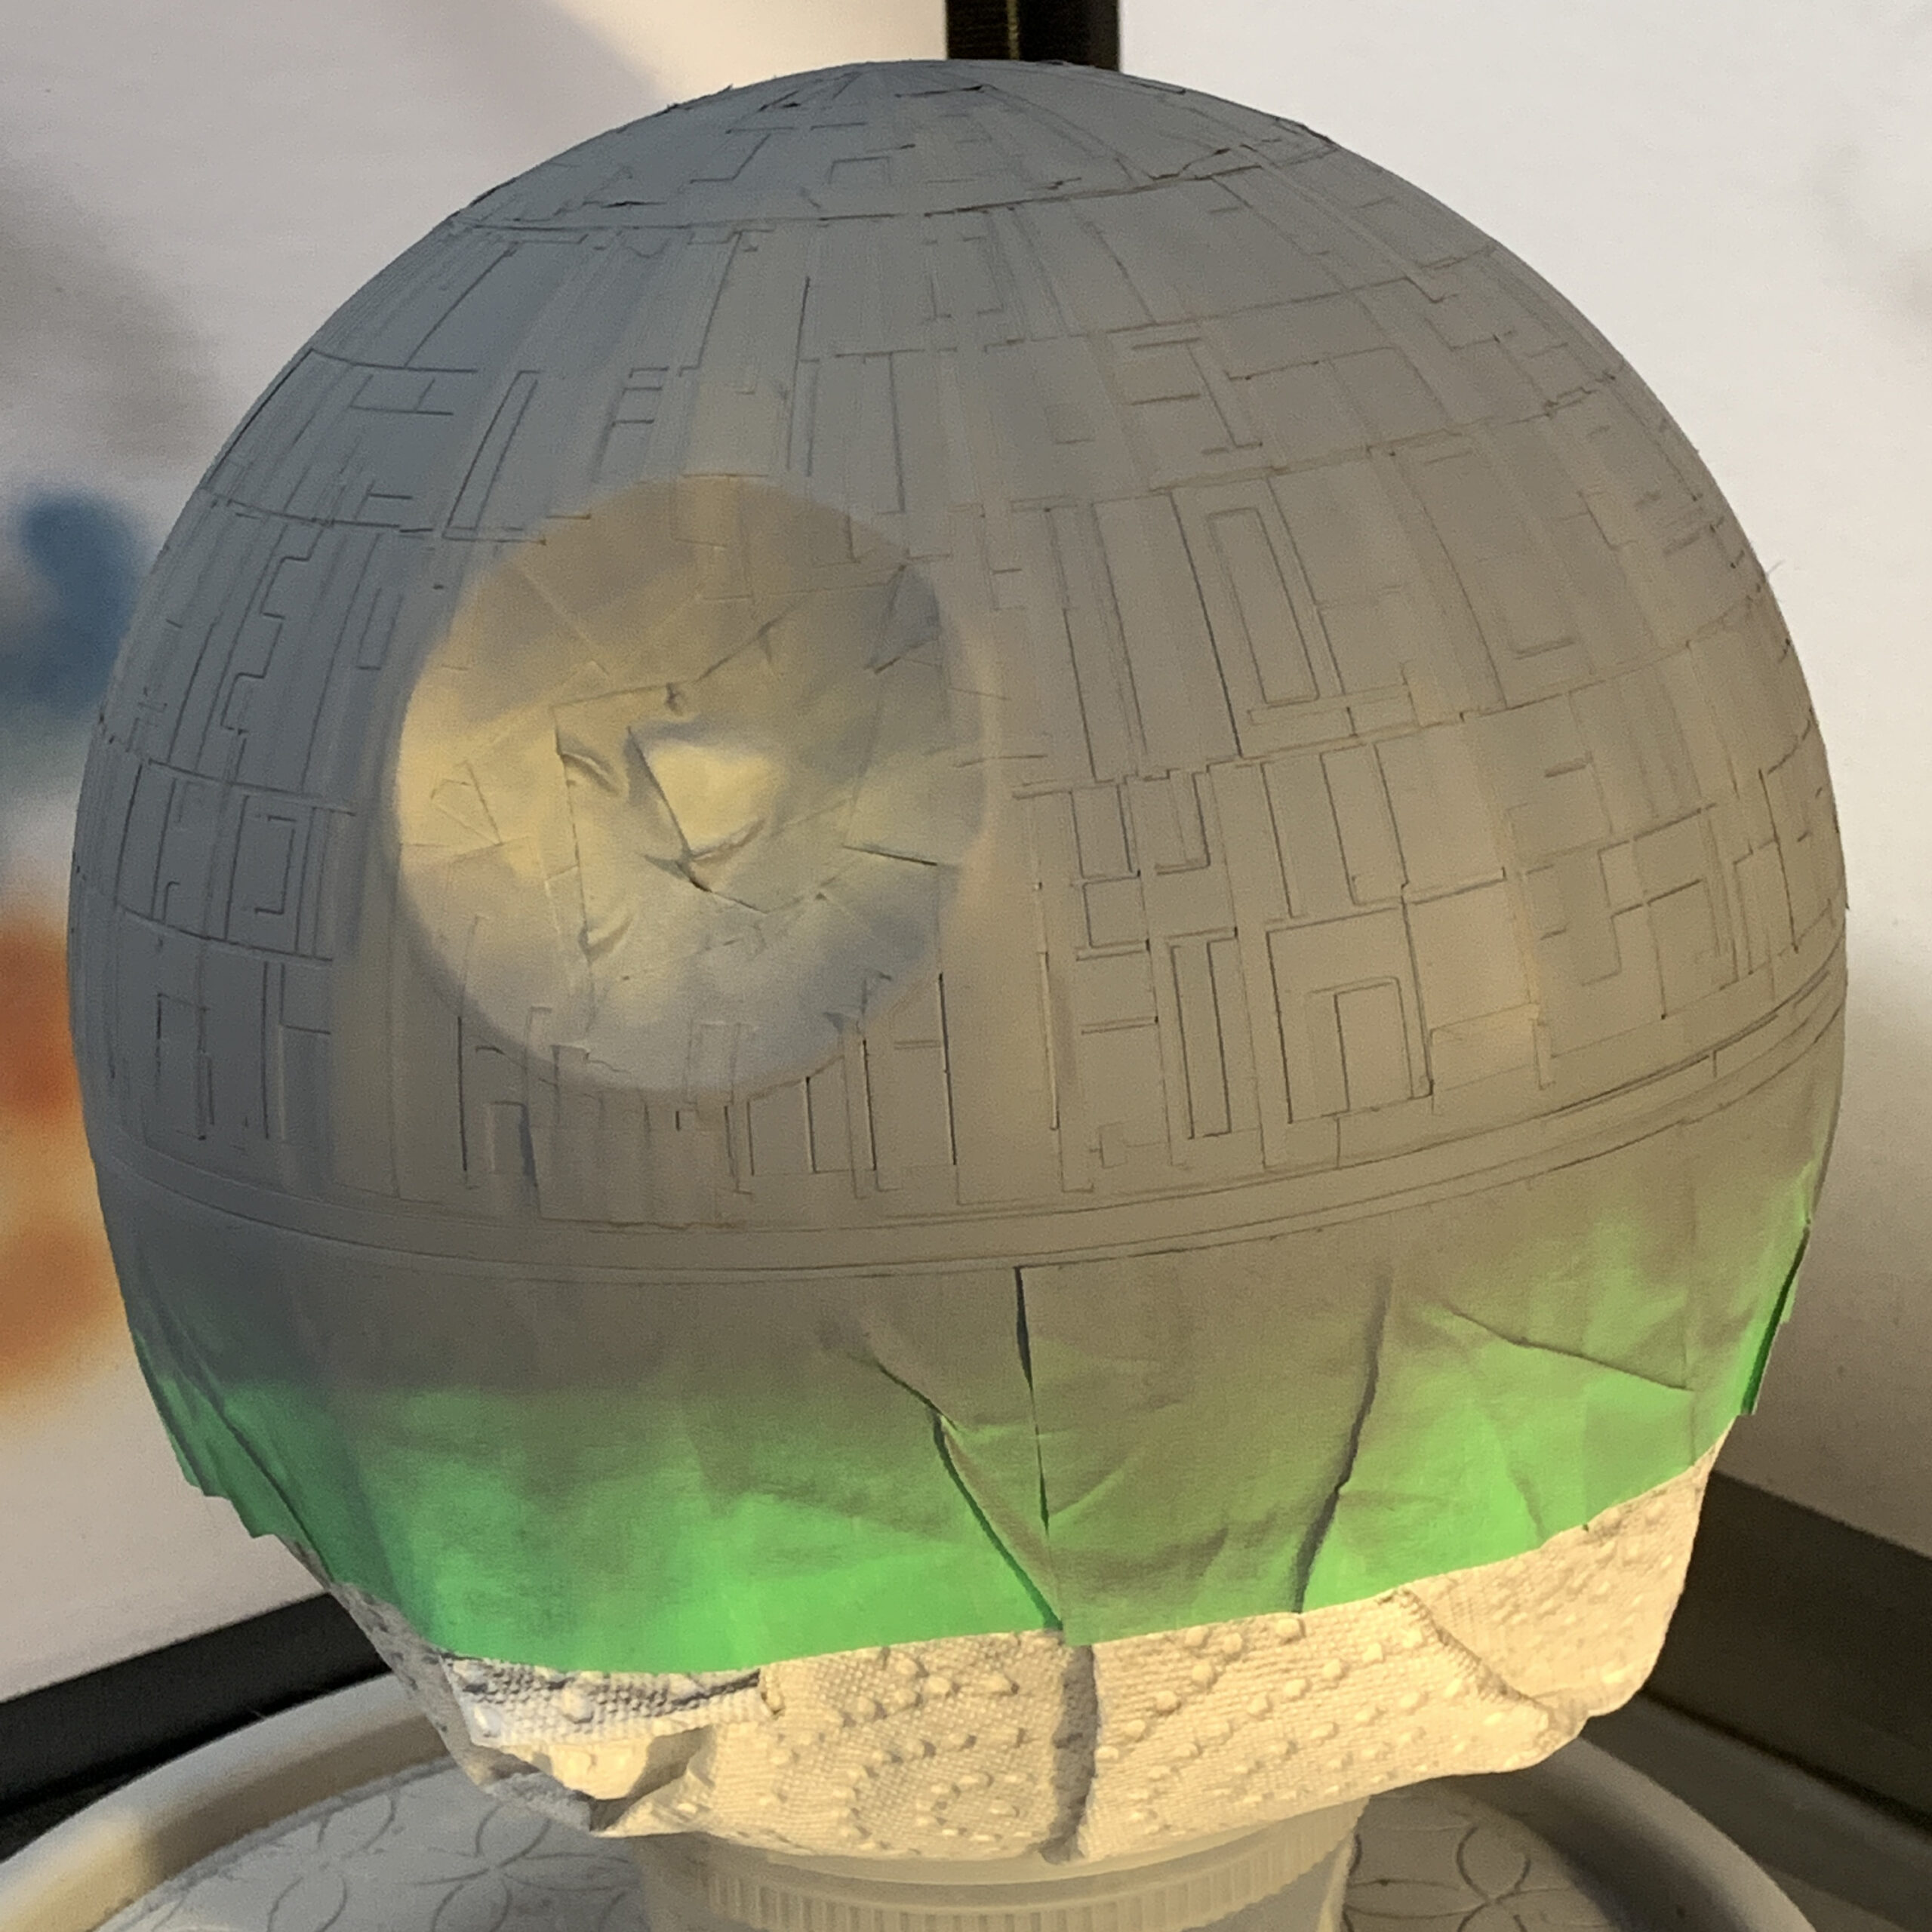
I did the top half first, then the super laser dish.
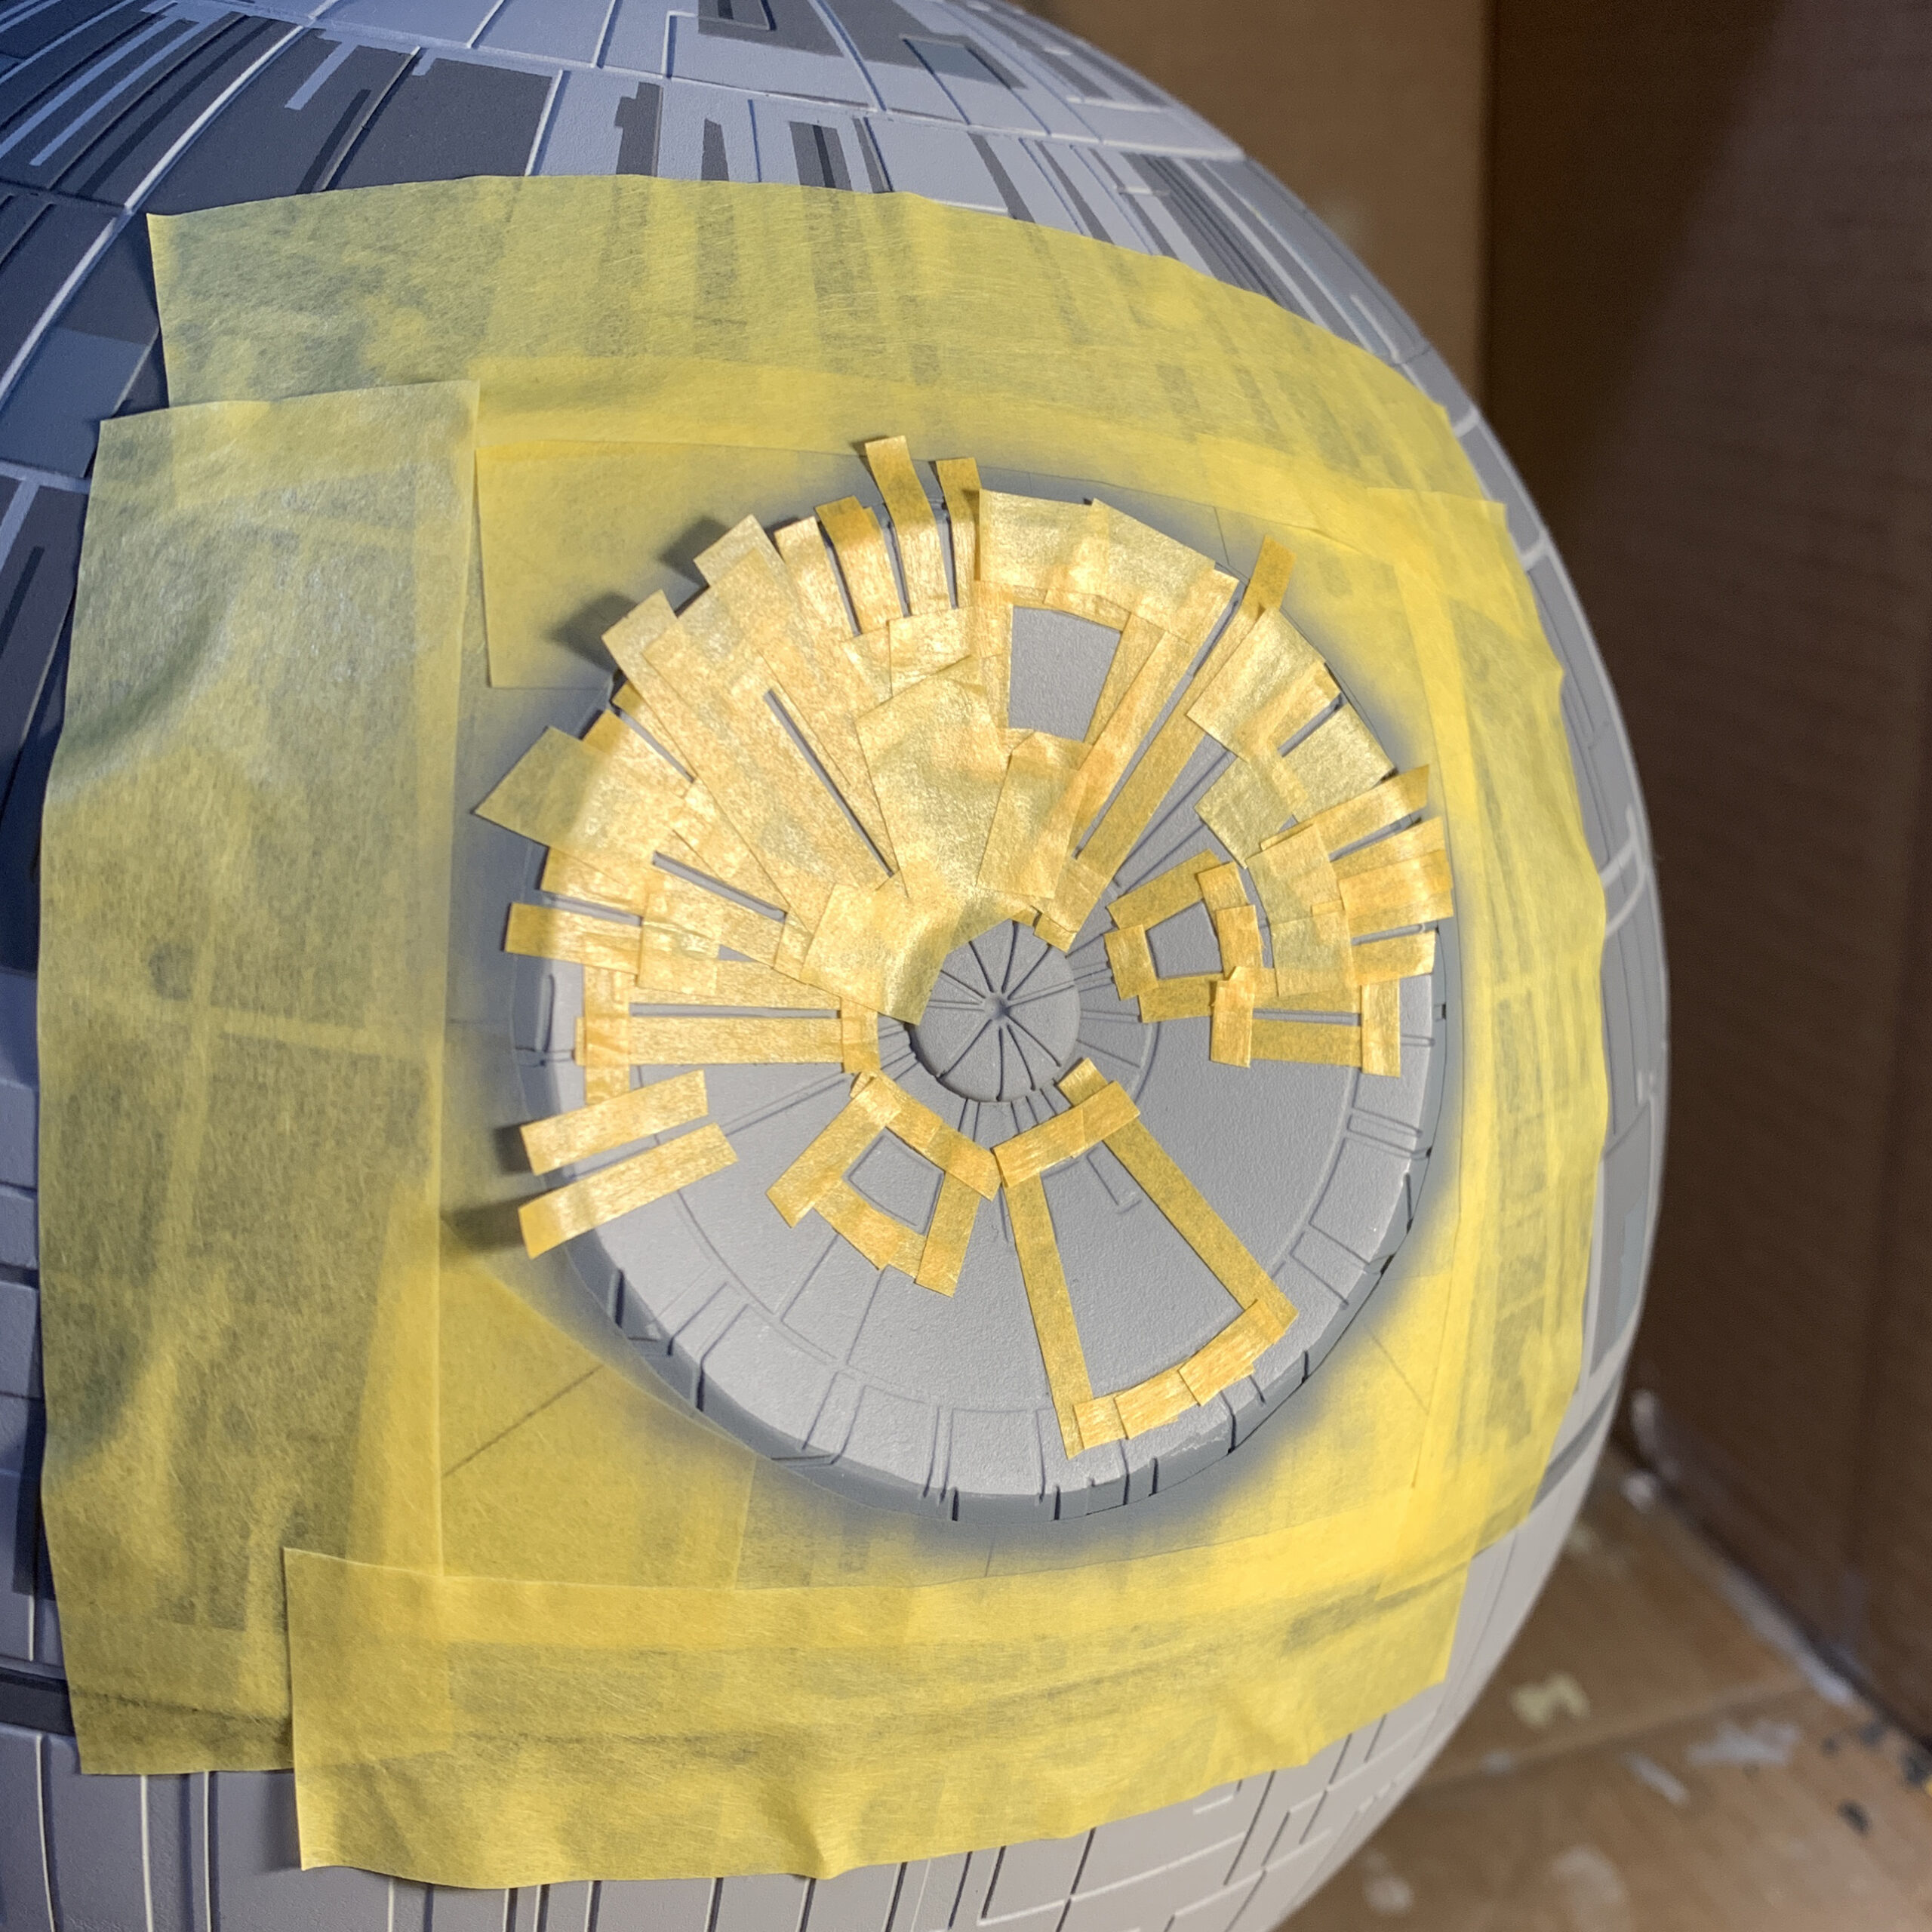
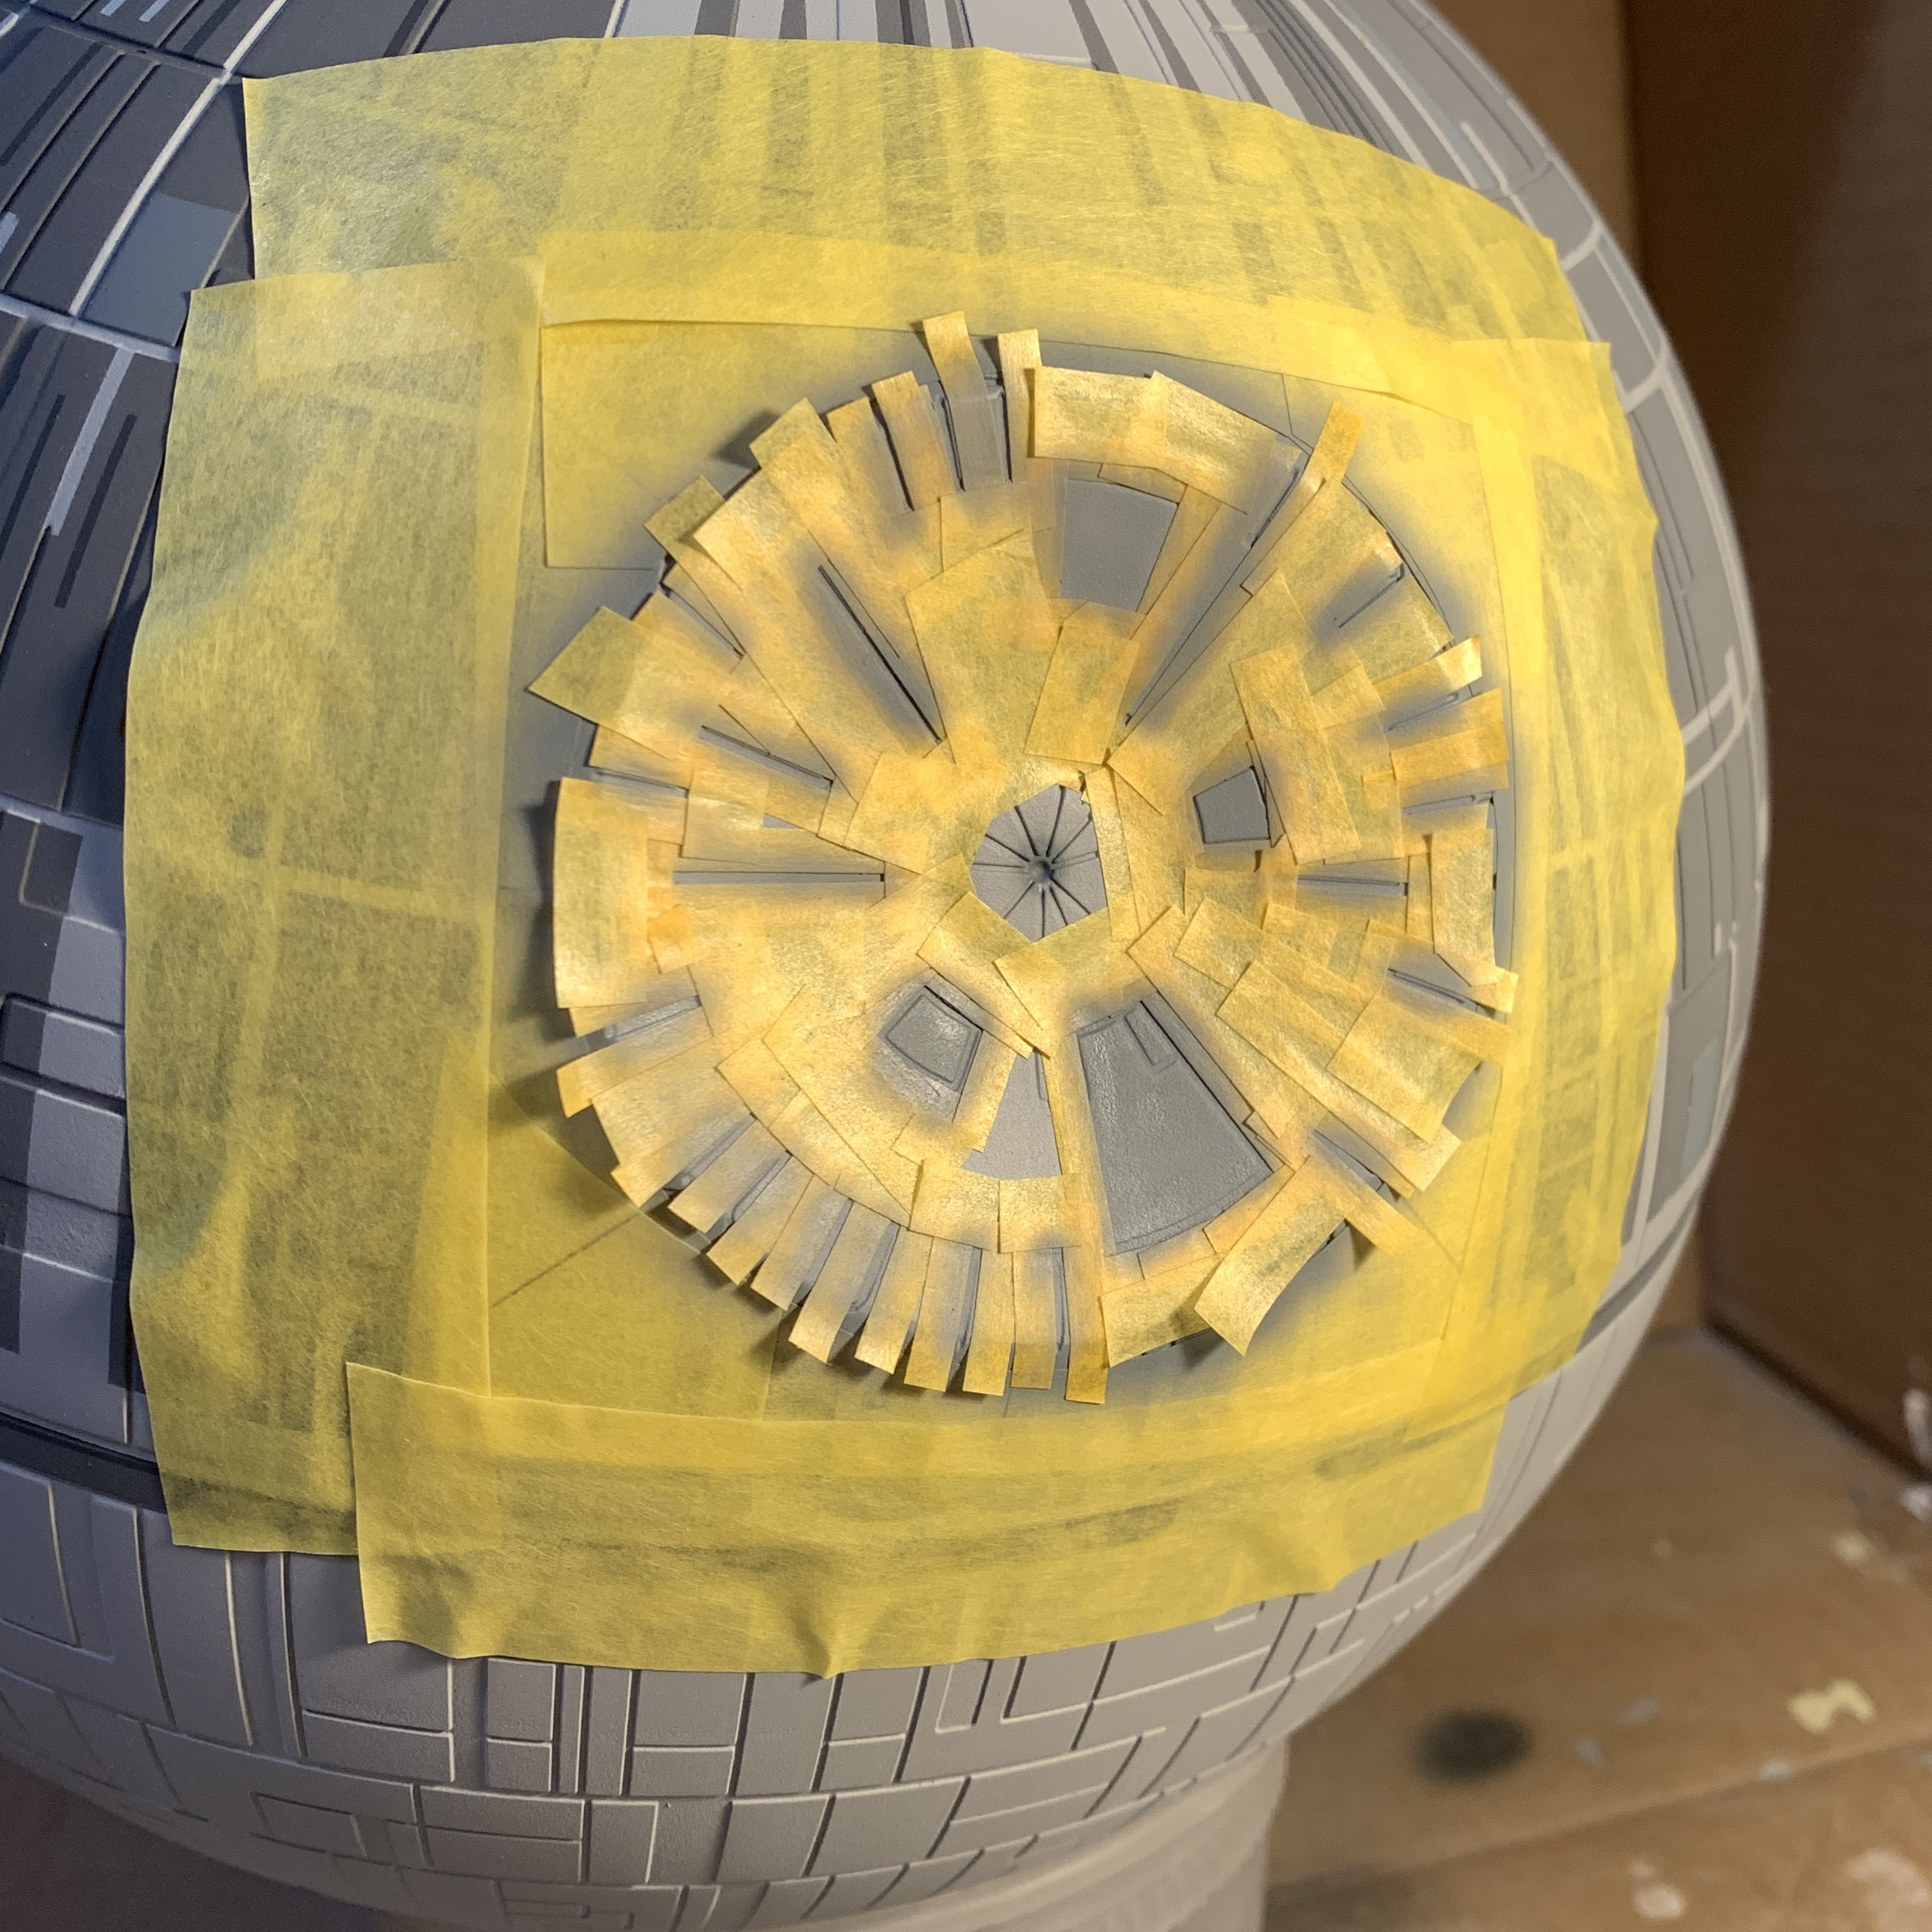
When the dish was done, I spray a gloss coat on the top half to protect it while I did the same steps on the bottom half. To say this used a lot of masking tape would be and understatement!
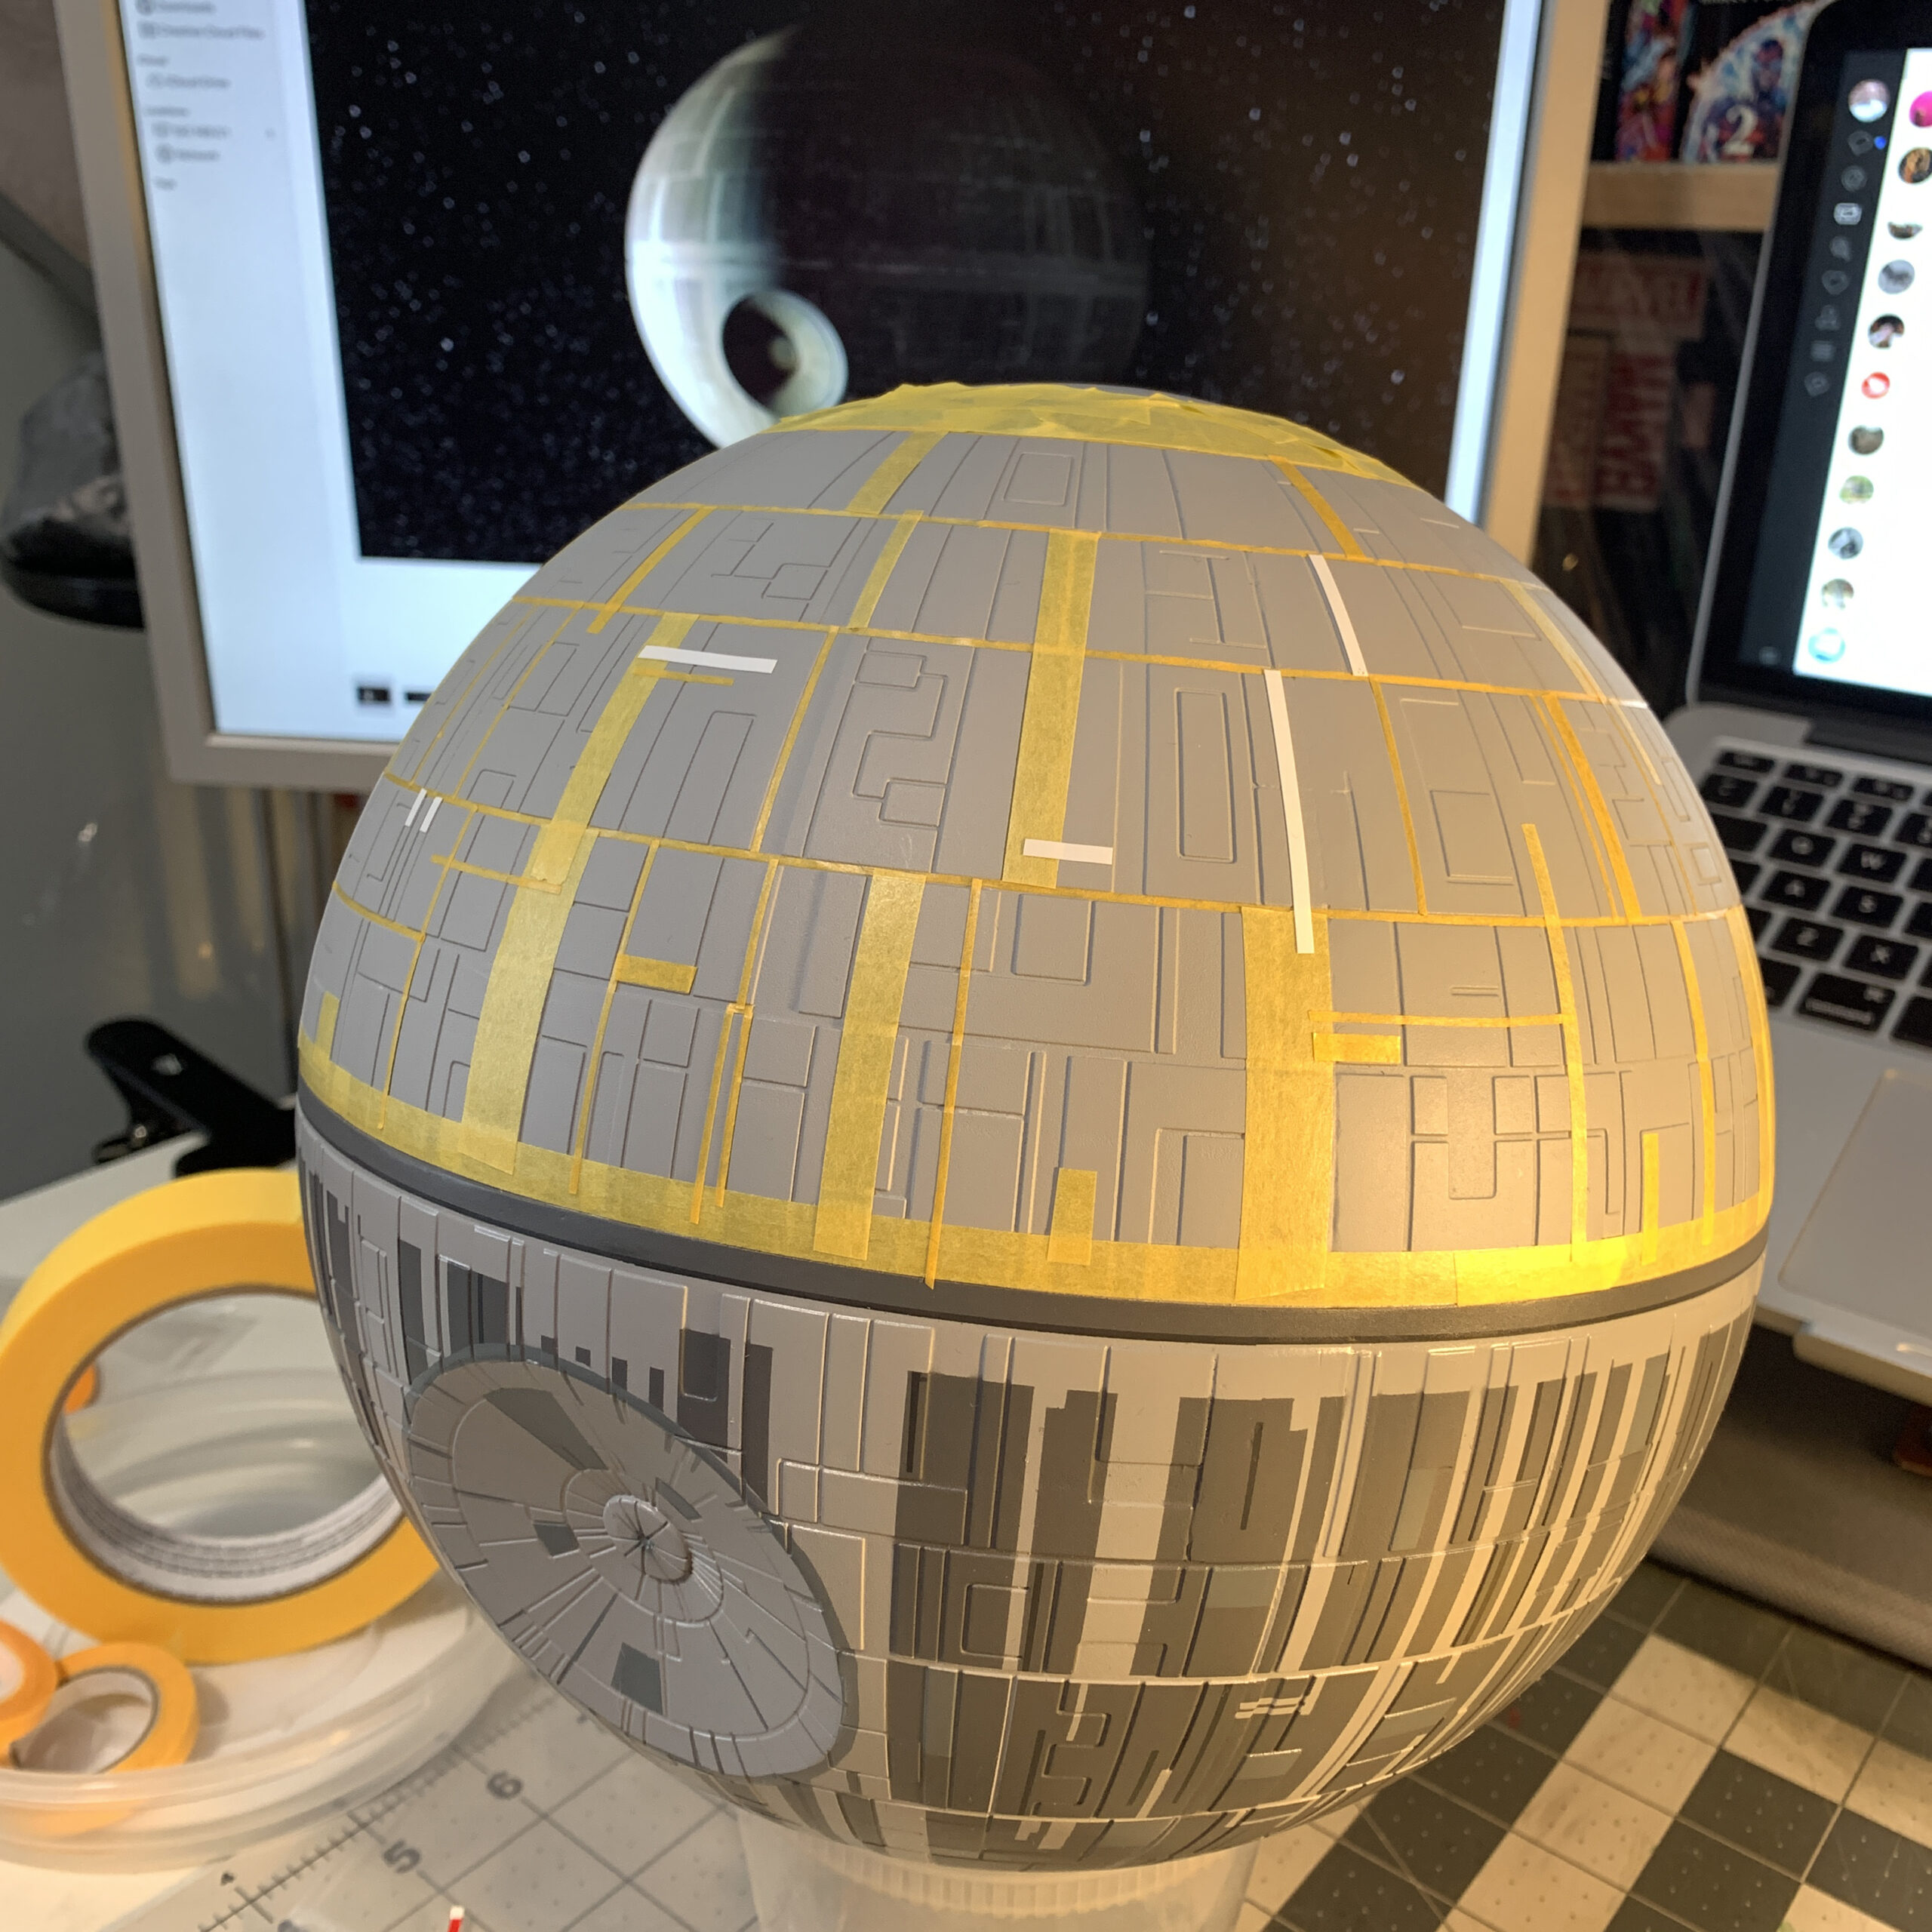
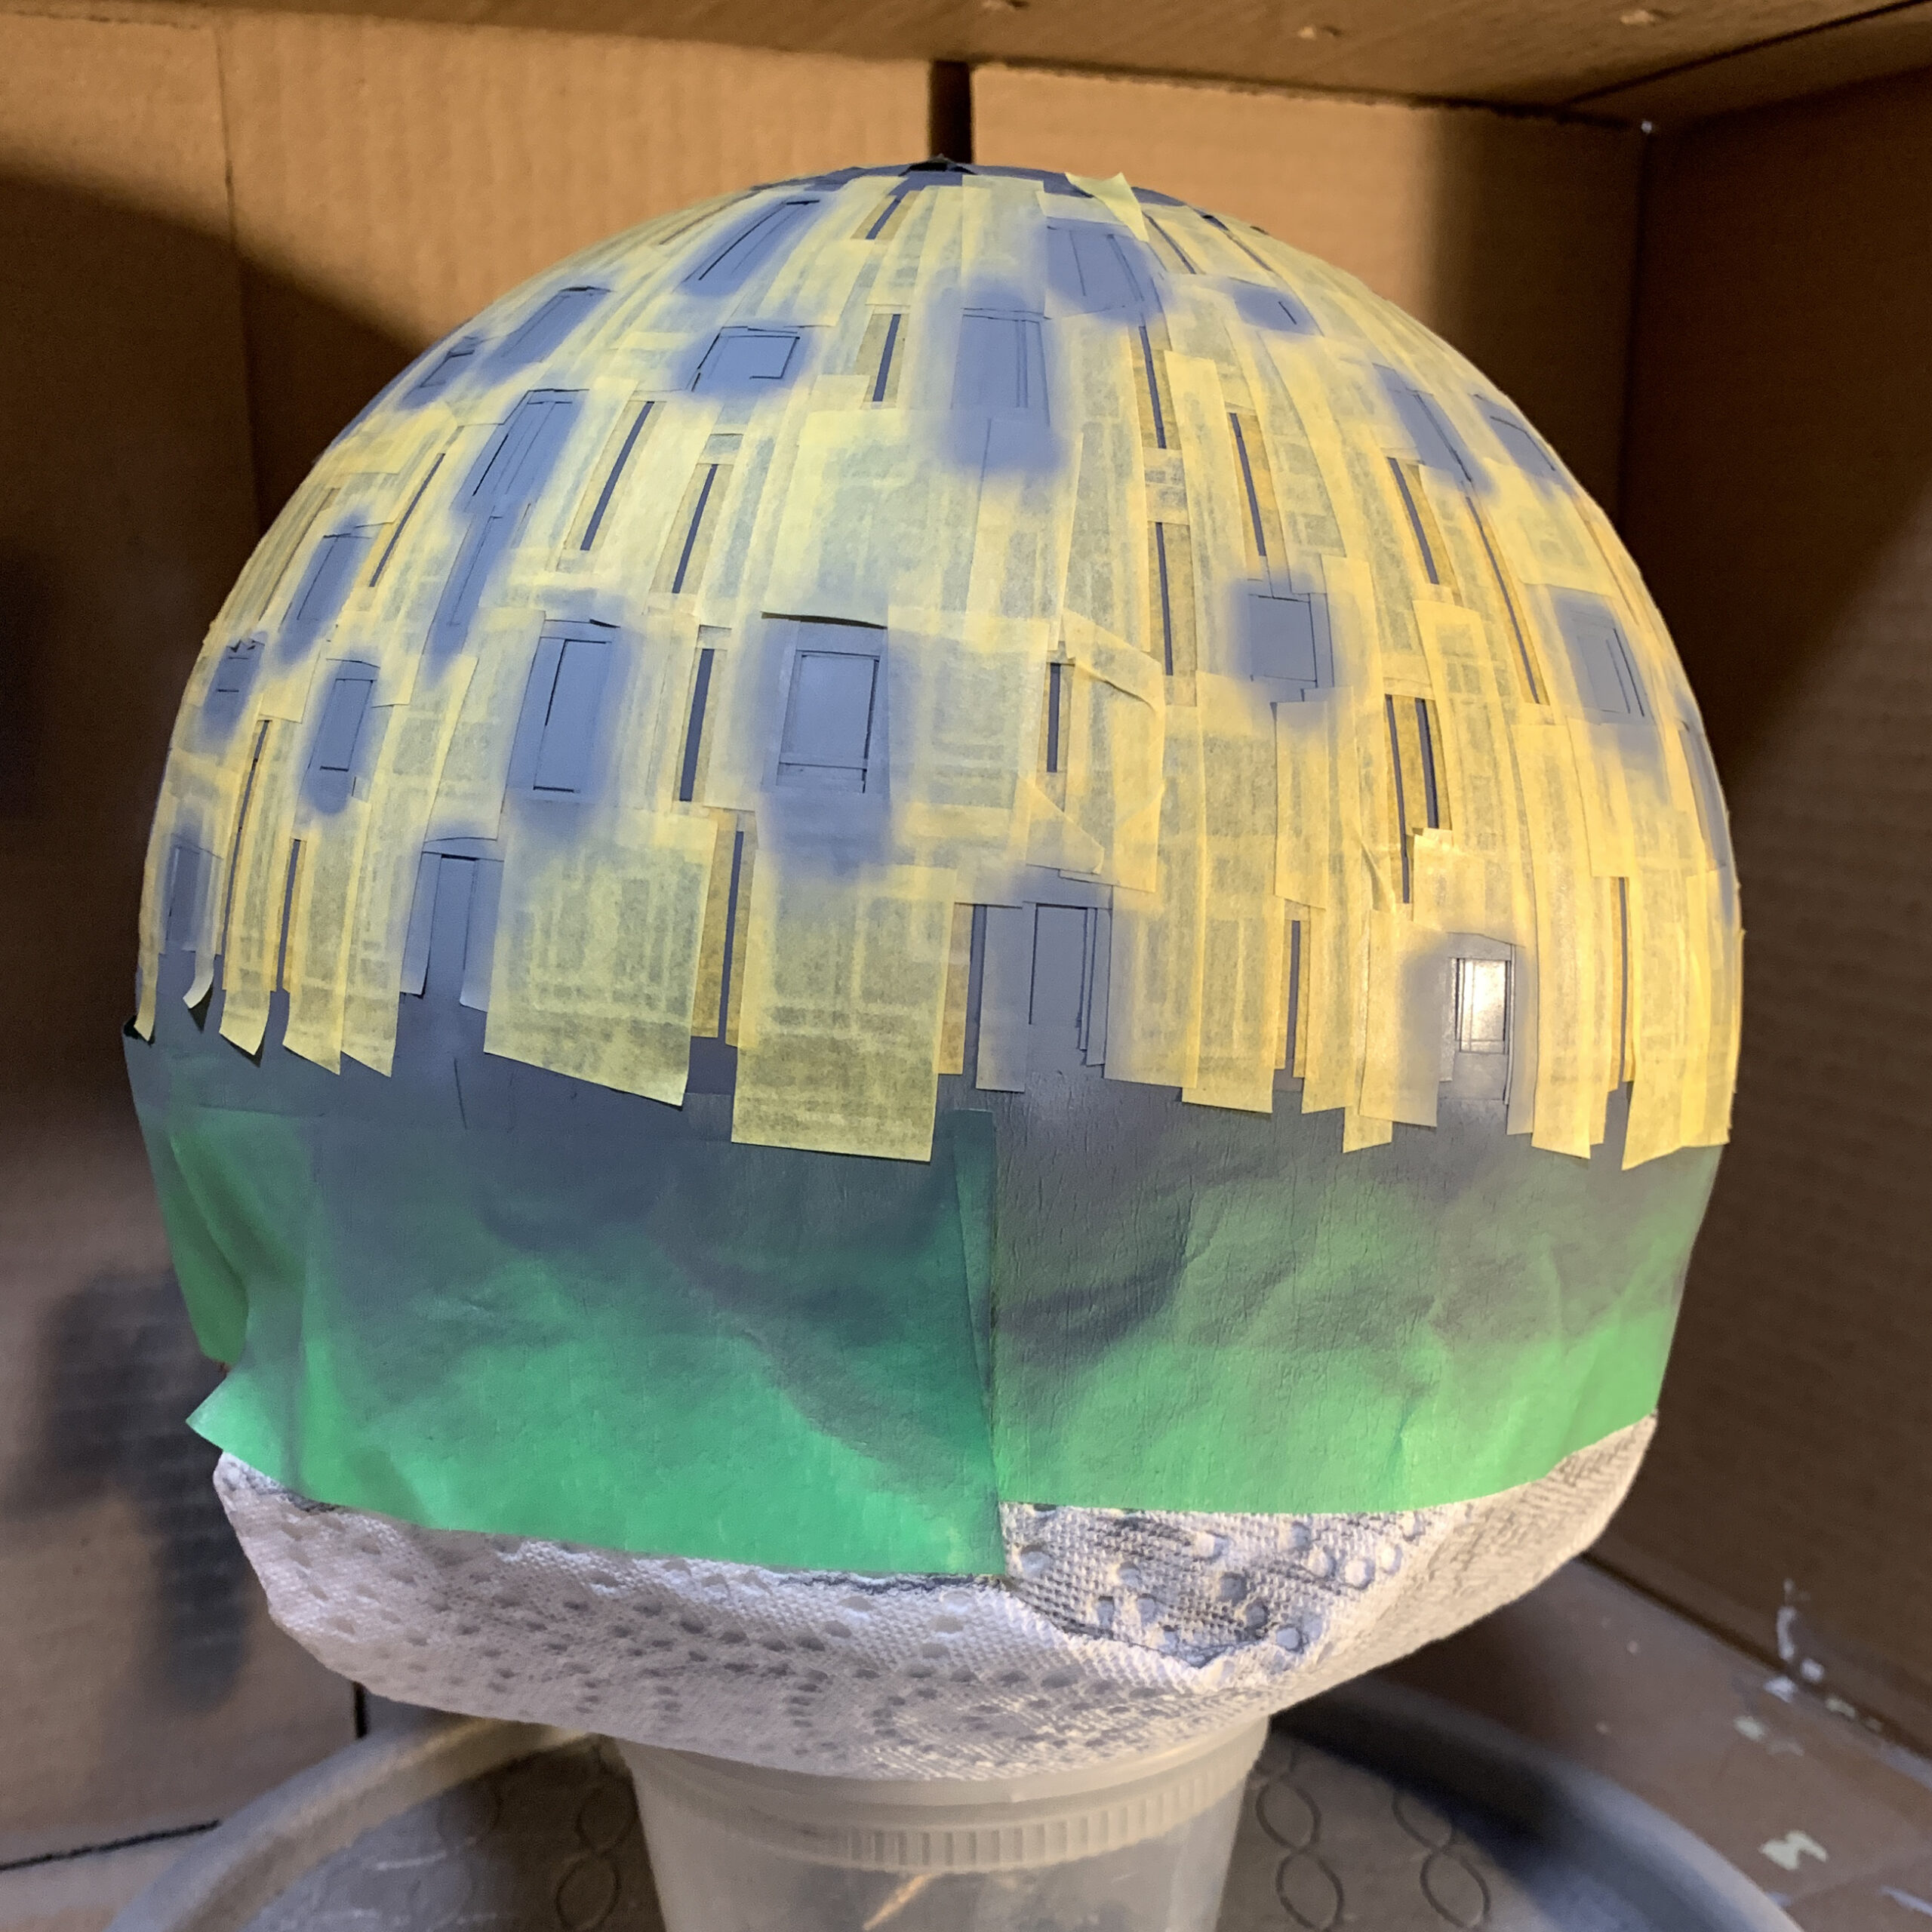
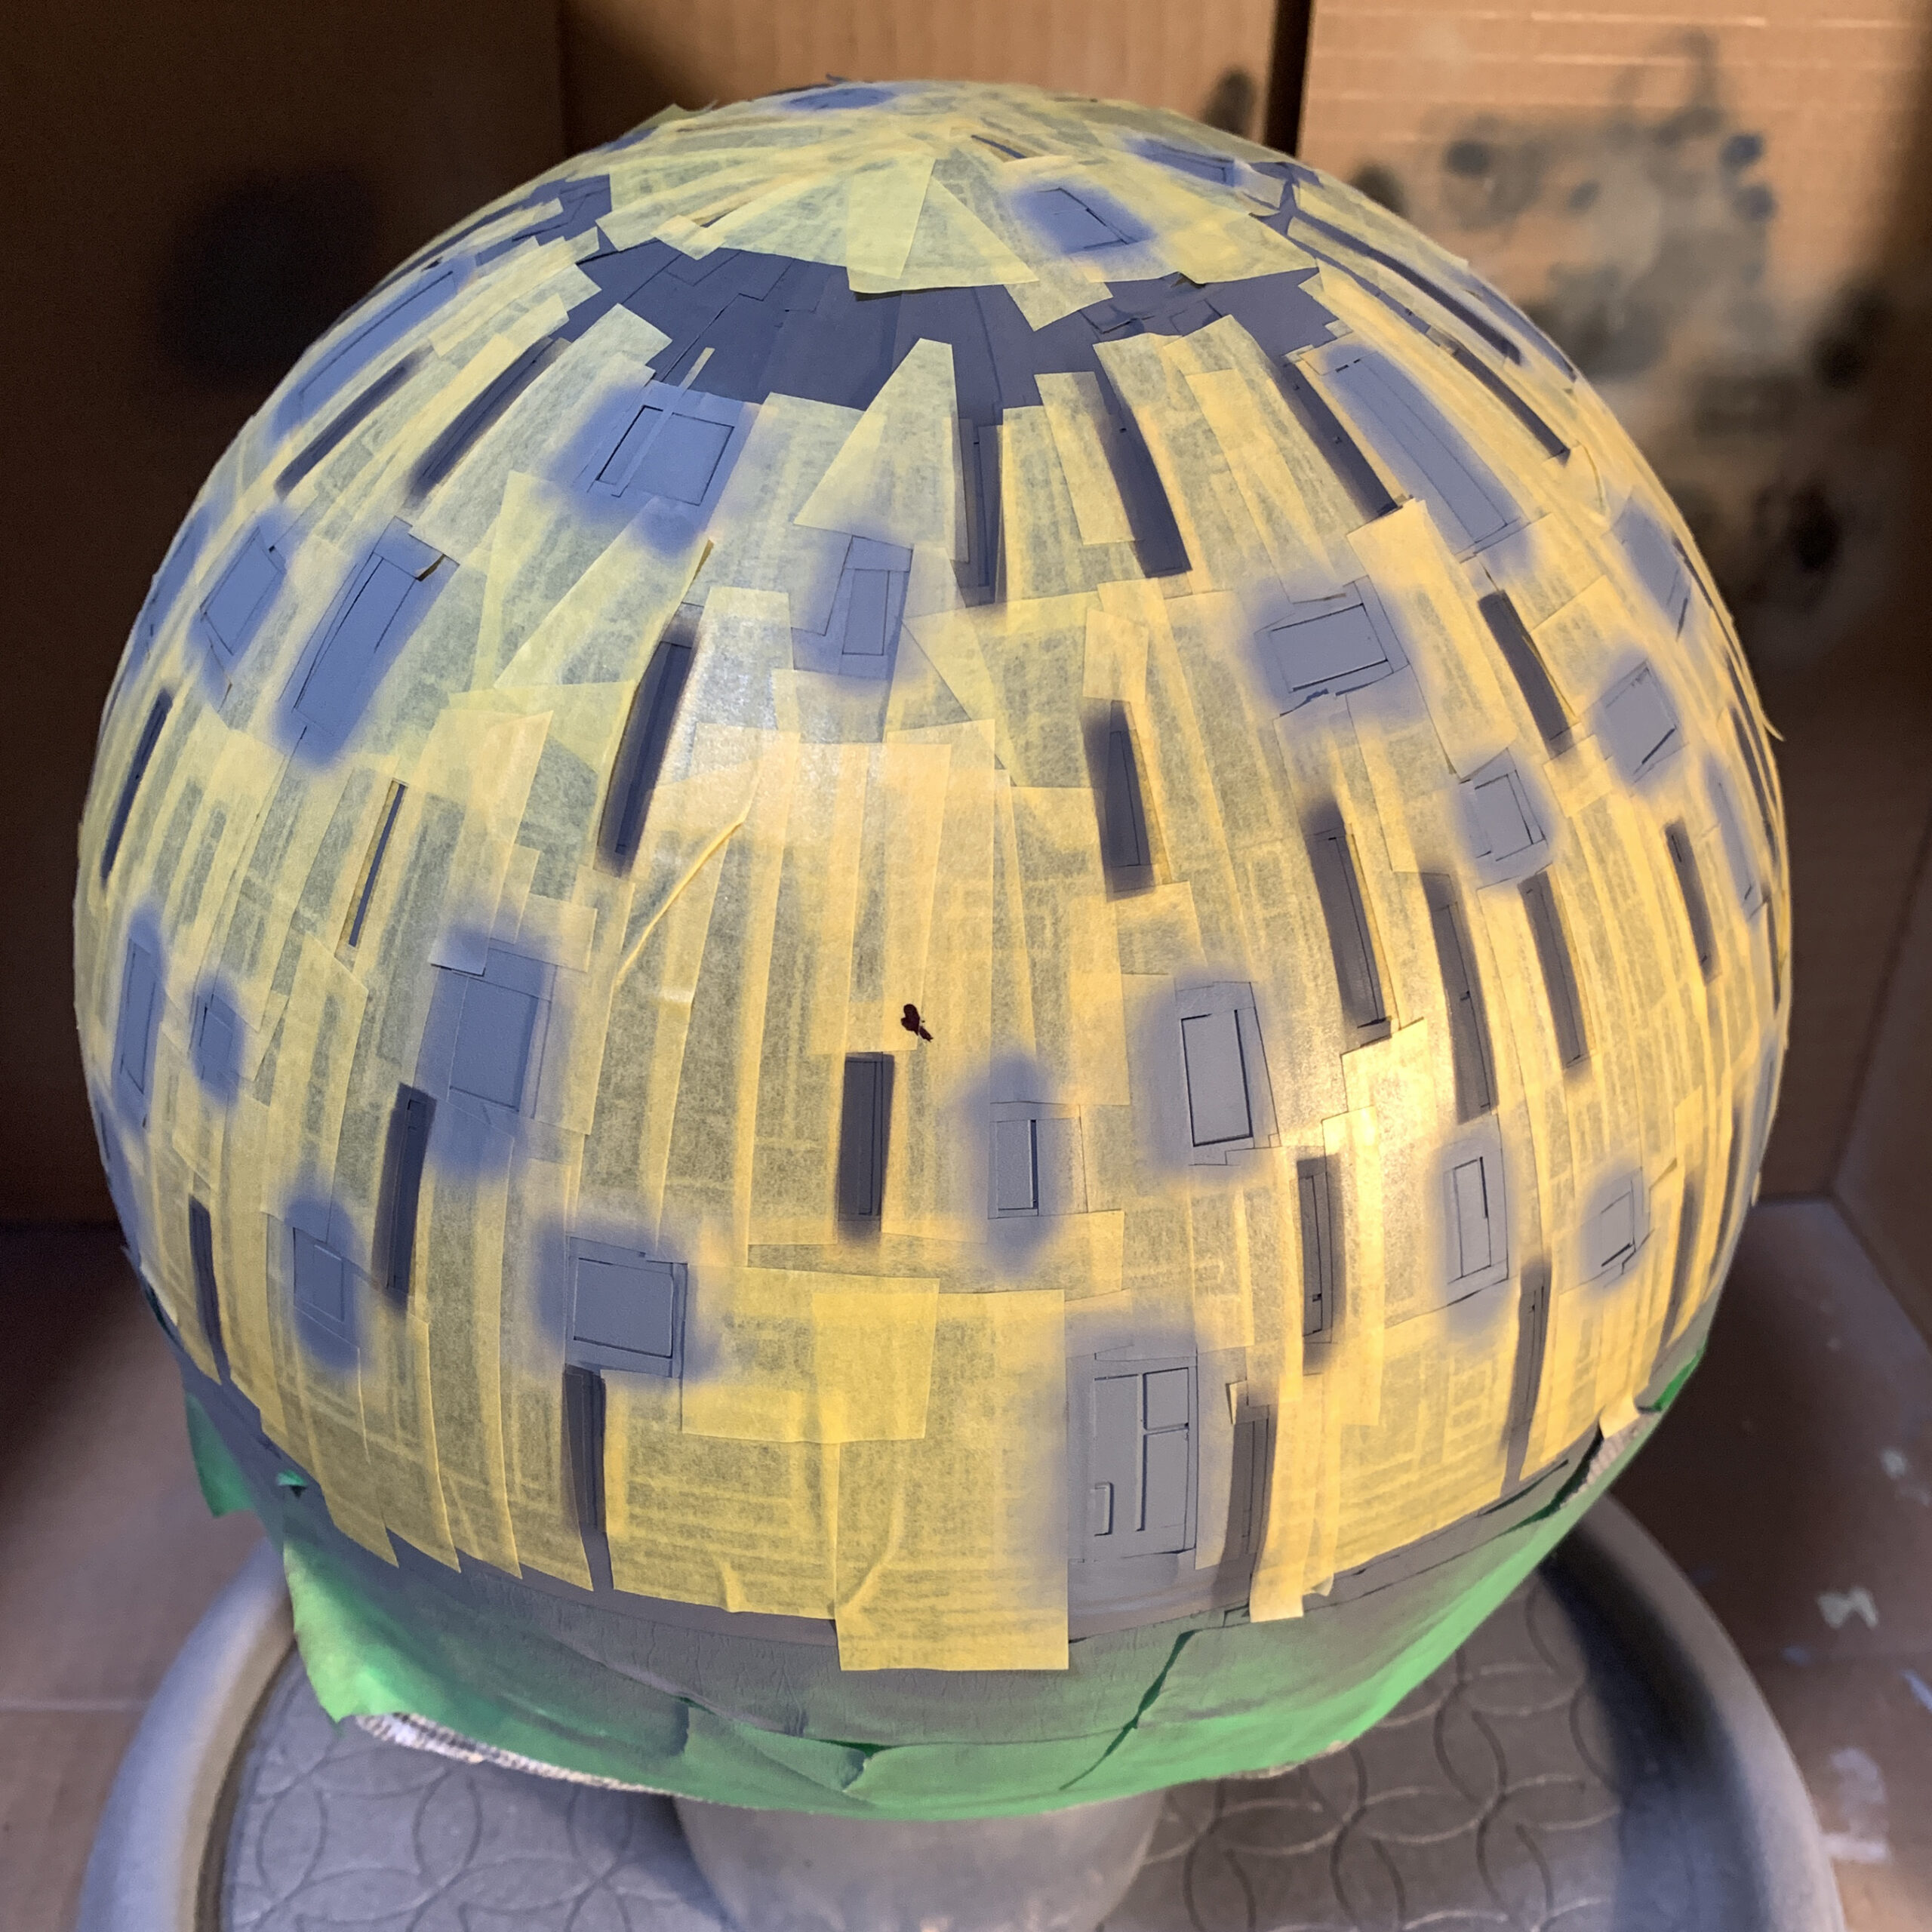
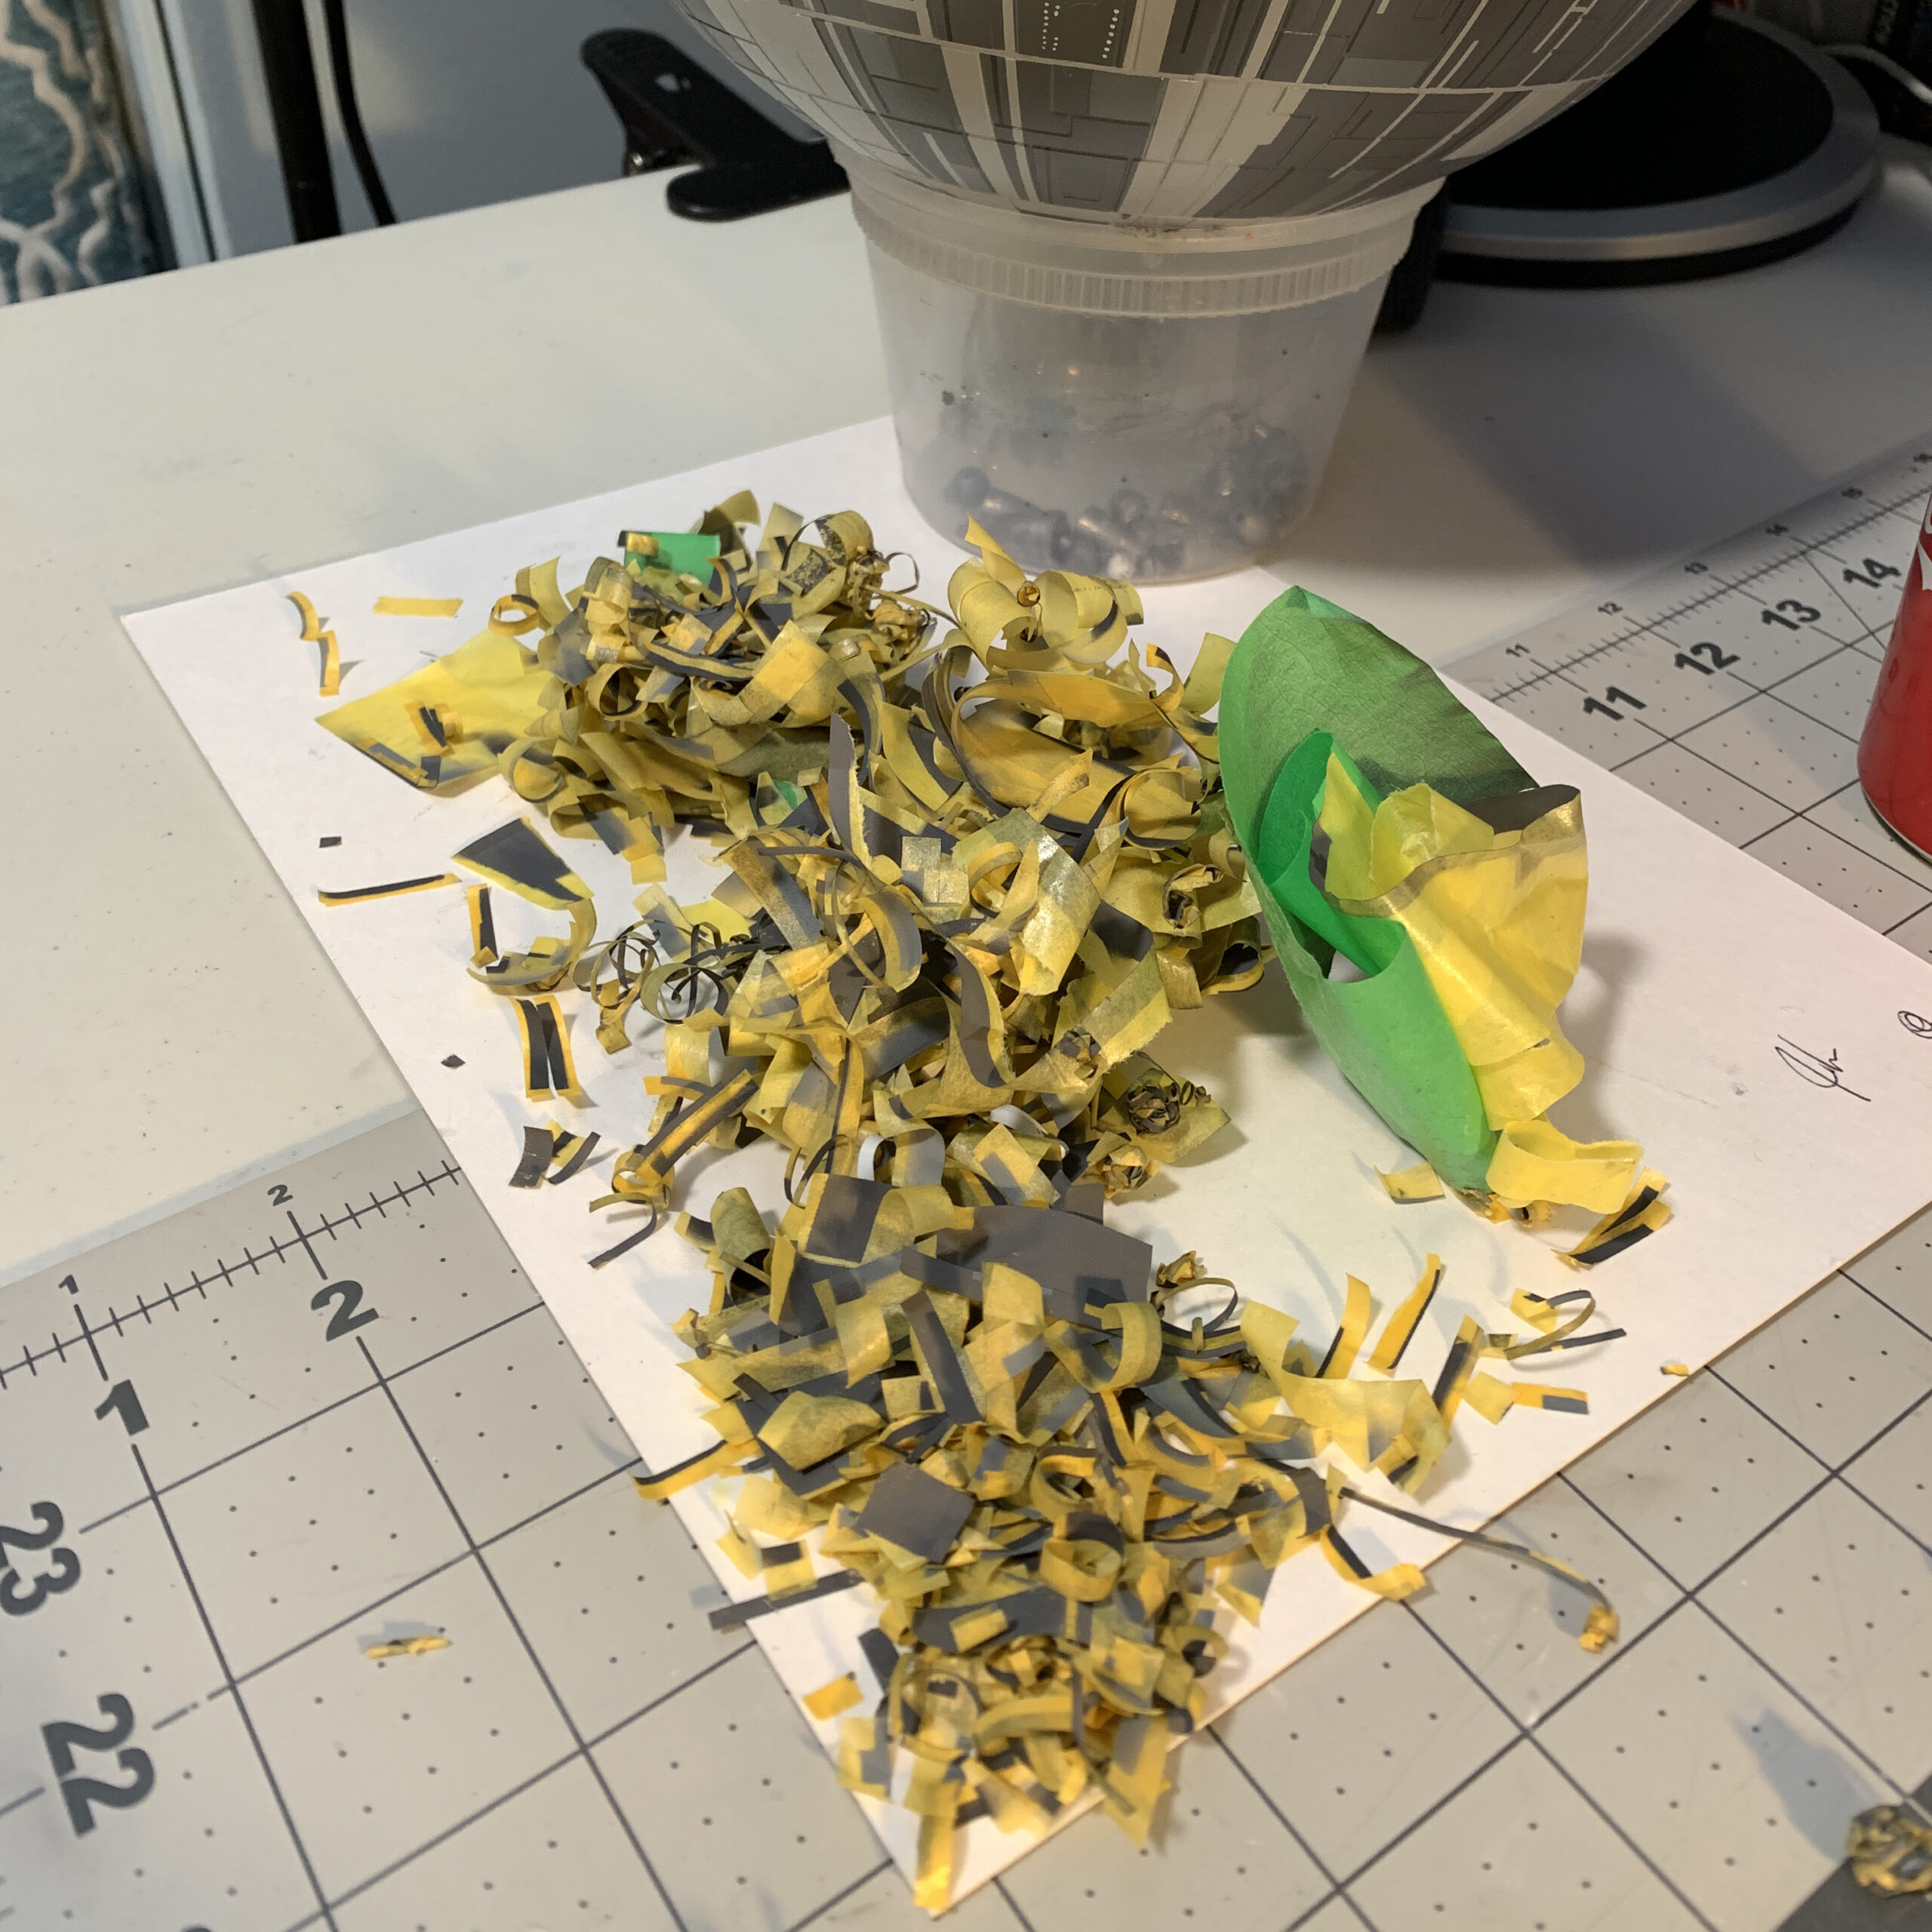
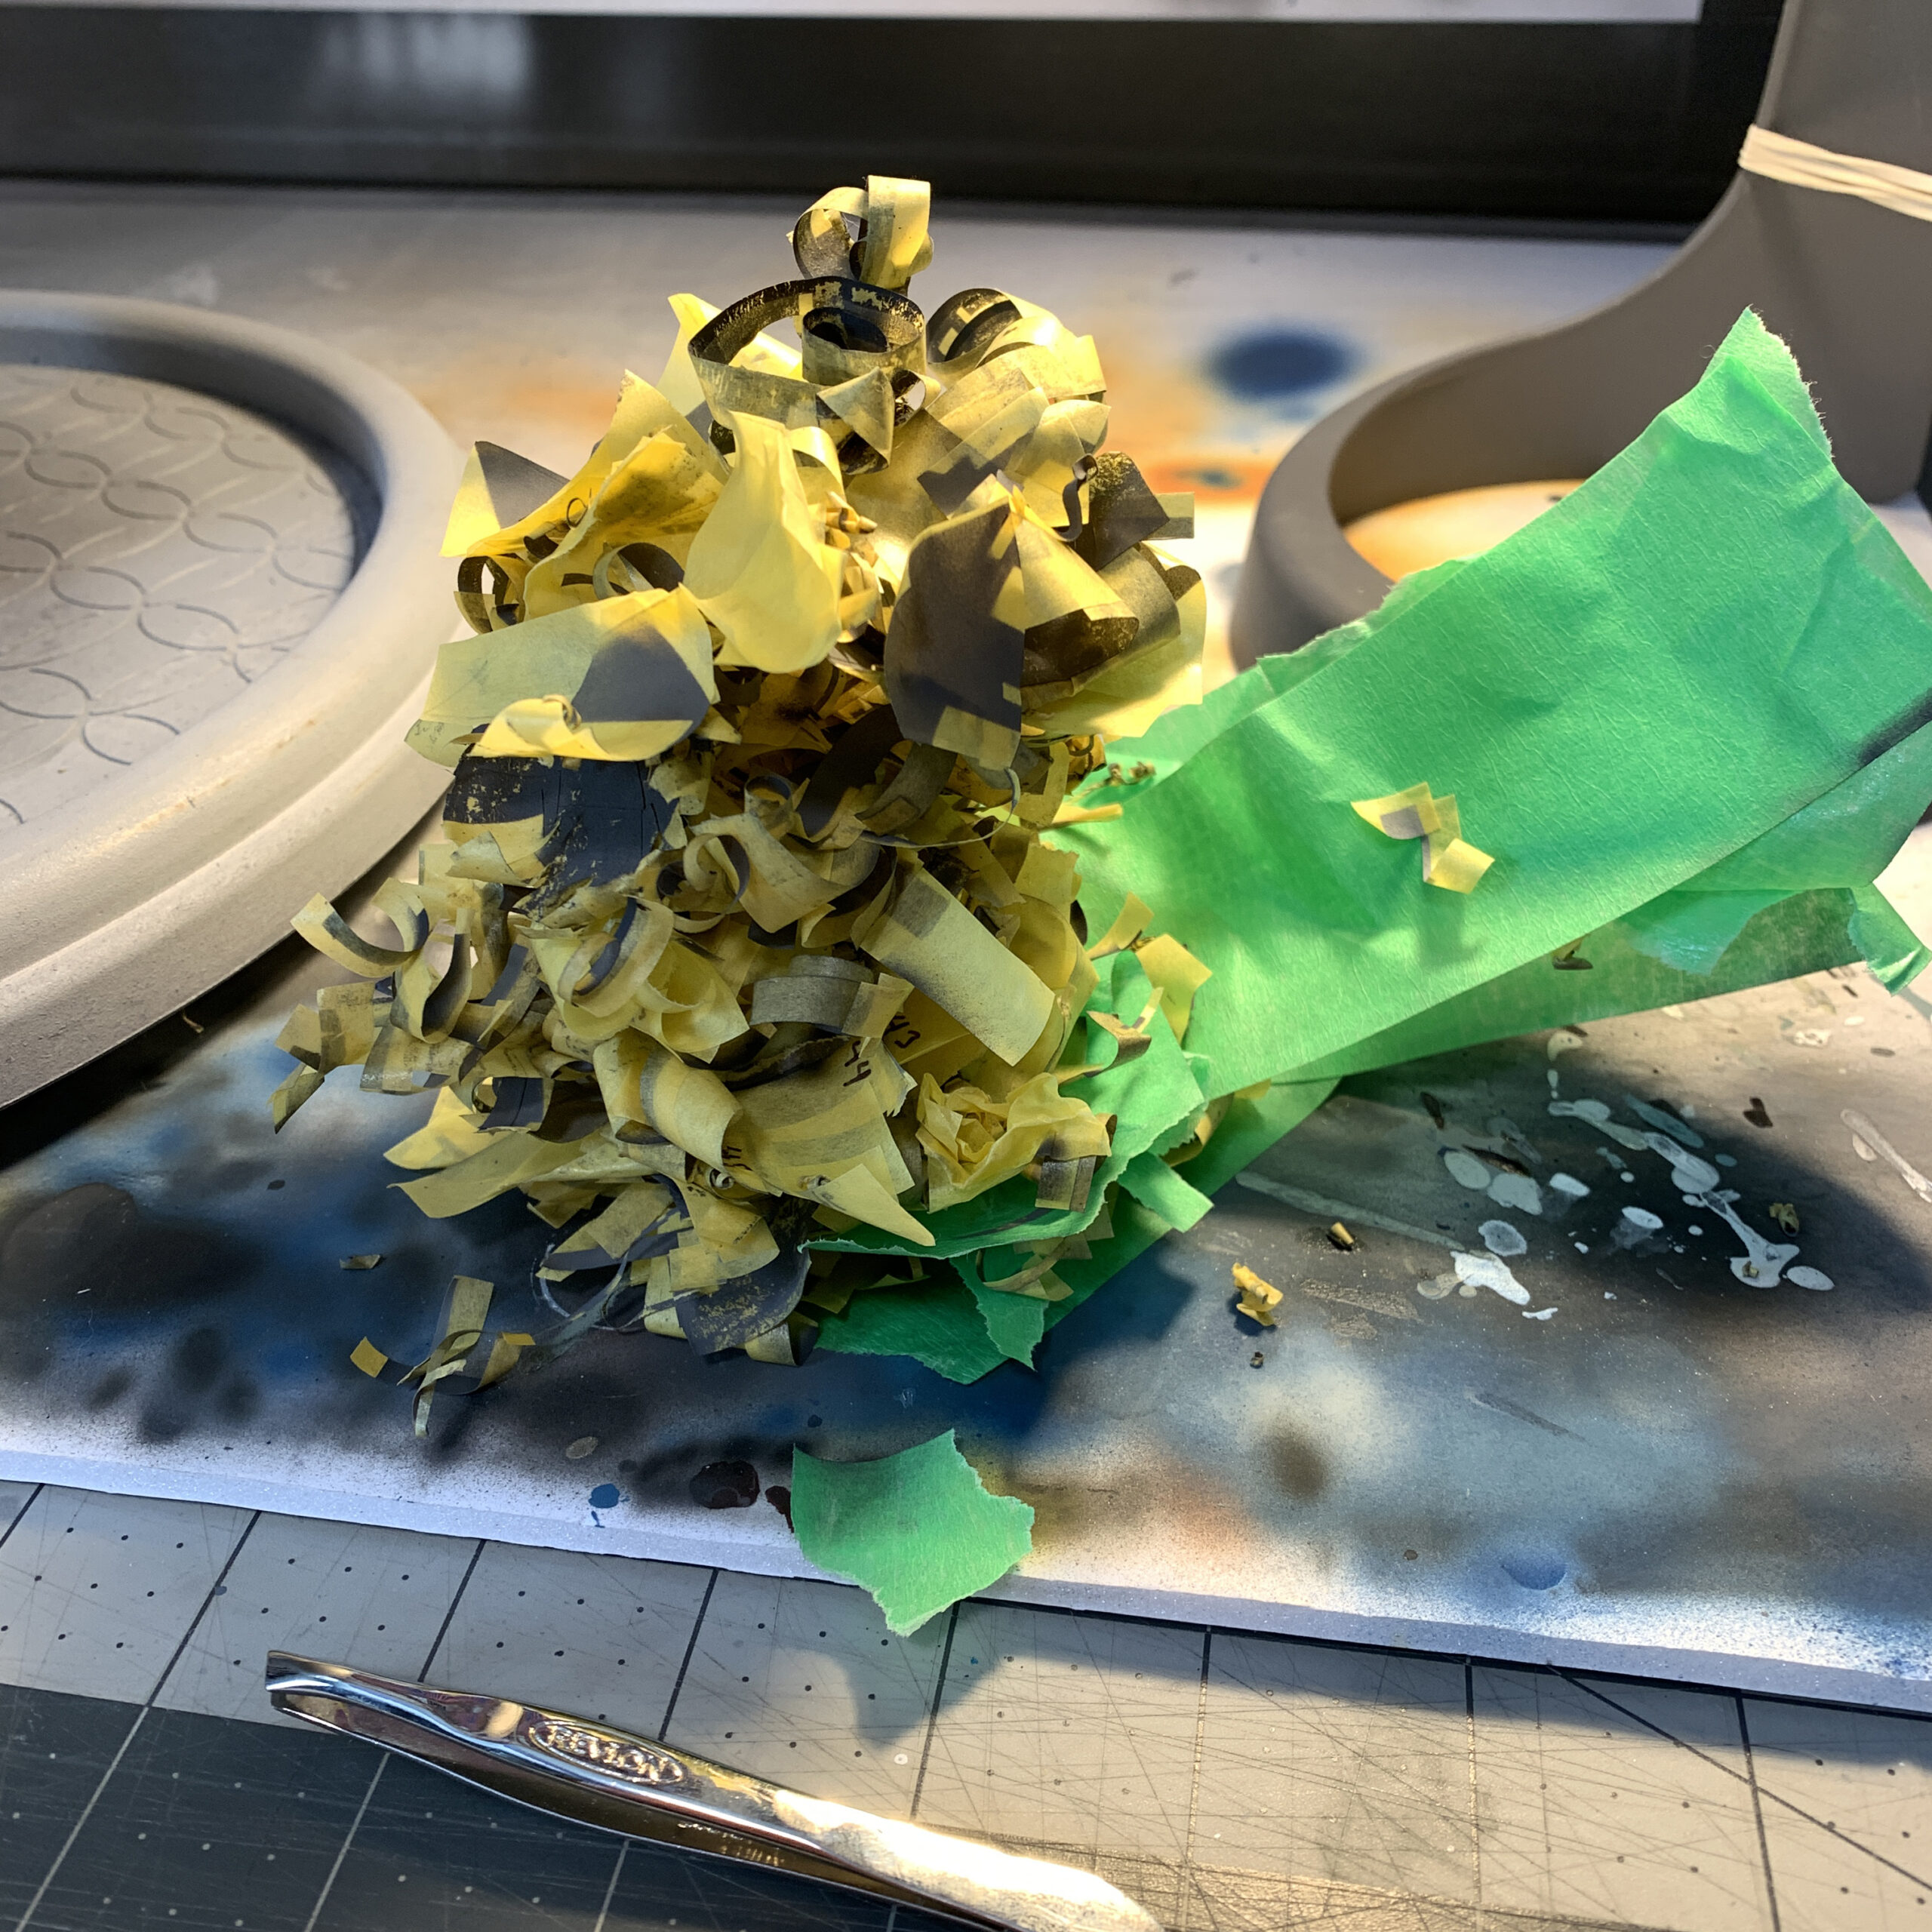
It took me about 10 hours to mask off each half, using a lot of tiny bits of masking tape from Tamiya and Vallejo.
The airbrushing itself took less than 10 minutes.
The end result is pretty solid though! In hindsight, I feel like using the light grey primer as a base maybe wasn’t the right call — it could be a touch darker. And or, my initial grey layer could be a touch lighter.
Next time, I’ll show the final detail painting and talk about how I turned the nine models into one mobile.